In this post, I would like to share a walkthrough of the GoodGames Machine from Hack the Box
This room will be considered as an Easy machine on Hack The box

What will you gain from the GoodGames machine?
For the user flag, you will need to run some SQLi Attacks on the login page. After that, we also need to abuse the SSTI on my profile page.
As for the root flag, you need to abuse a docker escape and copy the /bin/bash into Augustus access and give the root permission inside the docker environment
Information Gathering on GoodGames Machine
Once we have started the VPN connection which requires download from Hackthebox, we can start information gathering on the machine by executing the command nmap -sC -sV -p- <IP Address> -PN

As you can see, only port 80 is open to the public
Let’s access the website interface

I notice there is two buttons such as Blog and Store at top of the website.

The screenshot above shows the Blog web interface

The screenshot above shows the Store web interface

Let’s click the people icon and they ask us to enter credentials to sign in.
Let’s enumerate the website by using gobuster while accessing the website dashboard

Sadly, there’s nothing that looks interesting


Let’s register our own account on the Registration form

We have successfully registered

Let’s access the dashboard right now using the credentials that we just created earlier.

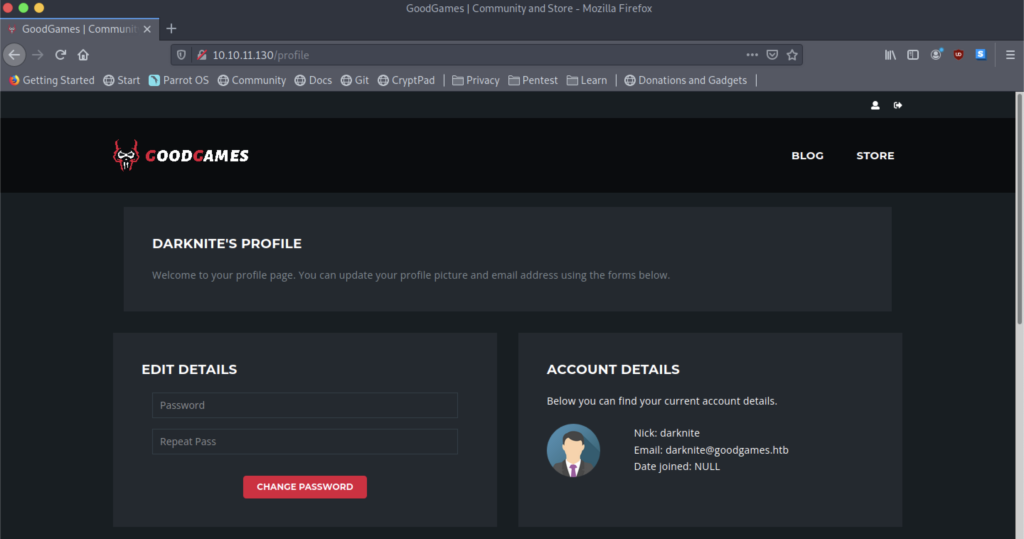
The login is successful, and it will be redirected to a profile page.

Nice! We managed to see the dashboard but there are no vulnerabilities or places to exploit at the website dashboard.
SQL Injection Attack
Burpsuite Method

Let’s open our burpsuite tool to analyze the packet.

Let’s inspect the packet

I try to use an error SQL Injection on the website but didn’t see anything at all.

Therefore, let’s try using a very common SQL Injection and it was a success.

As a result, let’s enumerate the SQL Injection using union based

On the website interface, we got the message “Welcome 4” and it was successful.

The screenshot above shows 4’s profile.

We should be able to enumerate the SQL Database deeper by using the syntax ‘ union select 1,2,3,database()– –

It was a success and it show the main

Next, we can use the syntax ‘ union select 1,2,3,concat(schema_name, ‘:’) from information_schema.schemata– –

It also success and it show information_schema:main:

Next, we can use the syntax ‘ union select 1,2,3,concat(table_name, ‘:’) from information_schema.tables where table_schema = ‘main’– –

It also success and it show Blog:Blog_Comments:User:

Next, we can use the syntax ‘ union select 1,2,3,concat(column_name, ‘:’) from information_schema.columns where table_schema = ‘user’– –

It is also successful and it show Email:ID:Name:Password:

Next, we can use the syntax ‘ union select 1,2,3,concat(id, ‘:’, name ‘:’, email, ‘:’, password) from user– –

We obtain a password hash and let’s crack the hash using hashcat


We got superadminisitrator as our password
sqlmap method
Aside from using burpsuite method, we can also use sqlmap to enumerate SQL database

We can use the command above to verify that sqlmap can enumerate the database

The screenshot above shows the output of the attack possible.


After that, we managed to notice that there are two available databases such as information_schema and main which resulted from the command
"sqlmap -u <target's url> --data 'email=darknite@goodgames.htb&passsword=b' --batch --dbs"

We notice that there are three available tables as the user, blog, and blog_comments which resulted from the command
"sqlmap -u <target's url> --data 'email=darknite@goodgames.htb&passsword=b' --batch -D main --tables"

We notice that there are seven available users such as admin and darknite which resulted from the command
"sqlmap -u <target's url> --data 'email=darknite@goodgames.htb&passsword=b' --batch -D main -T user --dump"Admin’s Dashboard on GoodGames Machine

Let’s access the admin’s dashboard using the username and password we obtained earlier.

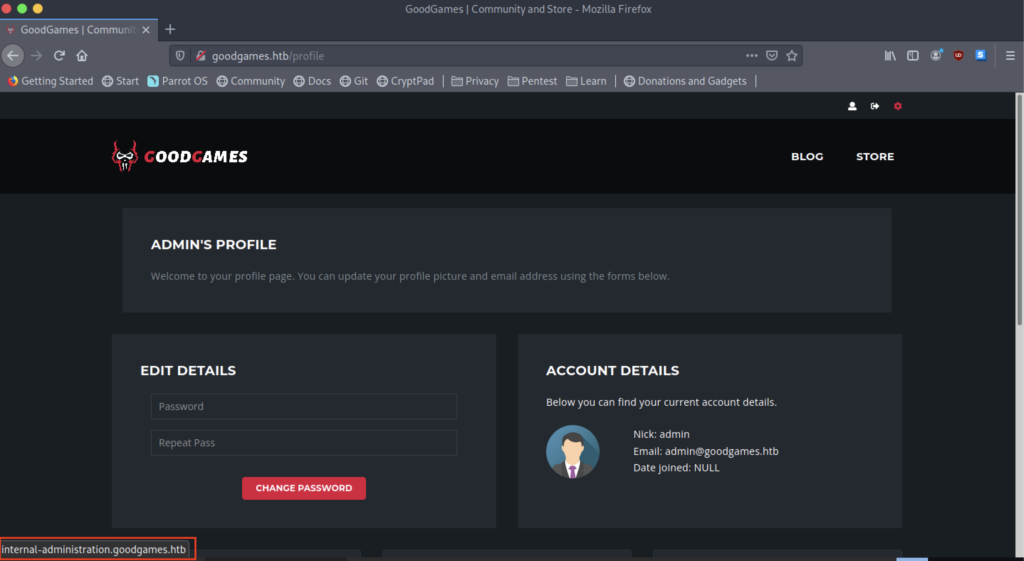
It was a Success that will be redirected to an admin’s profile page.


On the dashboard, there is a new function that will lead to a new domain

However, we got a 405-page status which is a method now allowed!
Hold on! I did a mistake where it should be internal-administration but I type internal.administration

It’s a flask login page that should be vulnerable to Server-Side Template Injection
Let’s do some research and I managed to found out those links for some reading:
- SSTI in Flask/Jinja2. What is SSTI ( Server-Side Template… | by IndominusByte | Medium
- A Simple Flask (Jinja2) Server-Side Template Injection (SSTI) Example (kleiber.me)
- PayloadsAllTheThings/README.md at master · swisskyrepo/PayloadsAllTheThings · GitHub
Come back to our flask login page, We should be able to use the previous credentials to access the Dashboard

As expected, we managed to access the Dashboard using the previous credential

There is a section for “My Profile” and let’s check out what we can do inside My Profile

Oh Wow! We can edit our profile

Let’s try a common SSTI on Full Name and see how it response

It reflected on the profile name and let’s grab a reverse shell on the machine

We can start our nc listener so that we can retrieve our reverse shell

The SSTI command that we can use here can be seen as below:
{{ self._TemplateReference__context.namespace.__init__.__globals__.os.popen('id').read() }}

We only required to change “id” to our reverse shell command

Voila! We managed to receive our reverse shell on my listener

Sadly, it’s root inside a docker environment

However, we can access the /home/augustus directory

We can read the user flag by executing the command “cat user.txt“
Escalate to Root Privileges Access on GoodGames machine
Docker Escape

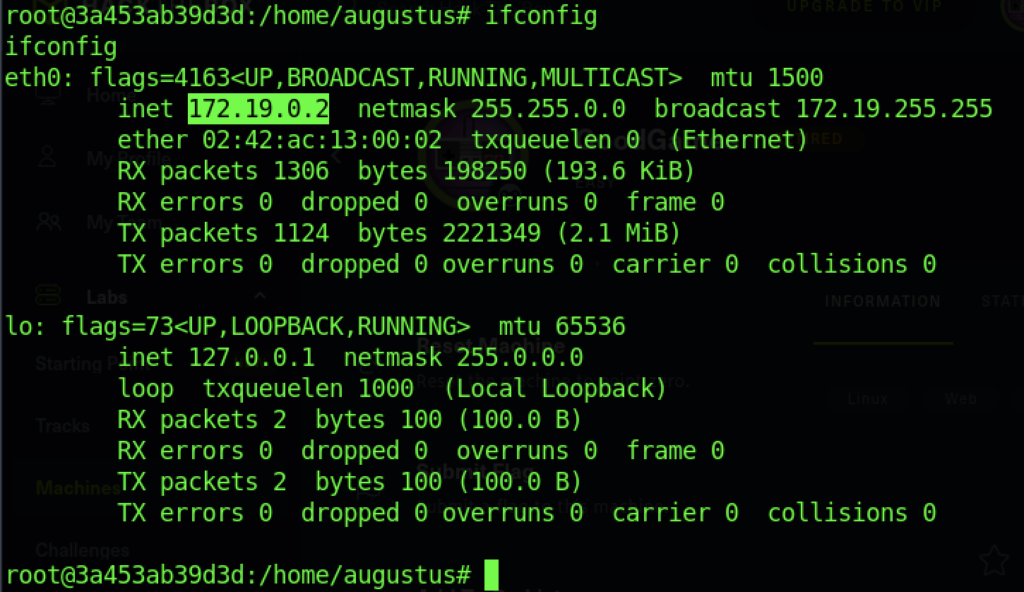
I notice that our connection is 172.19.0.2 which make me curious on 172.19.0.1 IP Address

Let’s grab a proper shell

I have shocked that we can access 172.19.0.1 via ssh service.

Let’s access using augustus credential and it works!

Sadly, we cannot run ifconfig using augustus credentials

However, we are able to verify the IP Address using the hostname -I command

Let’s create a new file on docker environment and see how it response

The file that we created inside docker environment have been assigned to root

Let’s copy /bin/bash into our current directory

We know that the file existed when we were inside docker environment

As a result, let give the file assigned to root privileges access

Aside from that, we need to give permission with SUID permission to the file

It look like we are ready to escalate to root

We can get root shell by running the command “./bash -p“

We can read the root flag by executing the “cat /root/root.txt” command
-THE END-
Happy Learning Guys!
Extra Information on GoodGames machine
We can go to /etc/shadow so that we can unlock and read the write-up


No responses yet